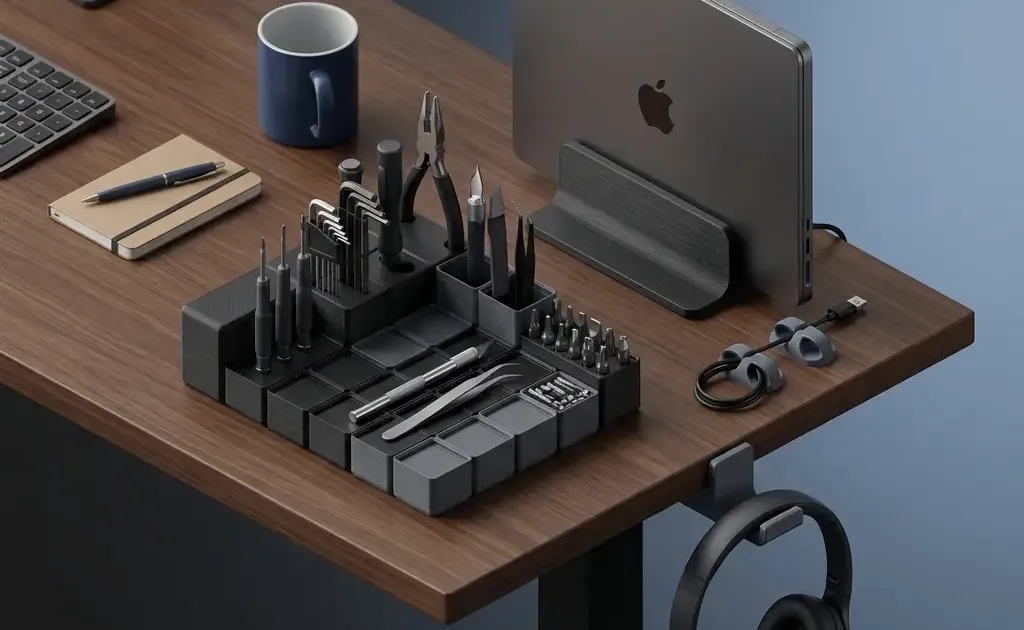
10 Practical Desk Upgrades You Can 3D Print for Under $1
Transform your workspace from a cable-cluttered mess to a productivity powerhouse with these 10 cheap, fast, and functional 3D prints.
If you’re anything like me, your desk is a constant battleground between “getting work done” and “where did that SD card go?”
The beauty of owning a 3D printer isn’t just making plastic dragons or articulated octopuses; it’s the ability to solve specific, annoying problems in your environment for pennies. Whether you’re working from home or trying to make your office cubicle feel more functional, 3D printing allows you to engineer your way out of frustration.
In this guide, we aren’t looking at “showcase” prints. We are looking at the highest-leverage upgrades you can make today—functional, fast, and incredibly cheap additions that transform a cluttered workspace into a high-performance cockpit.
The Psychology of the Perfect Desk
Before we dive into the prints, it’s worth asking: Why does this matter?
Visual clutter is more than just an eyesore; it’s a tax on your cognitive load. Every loose cable, stray SD card, and out-of-reach tool is a tiny “open loop” in your brain. Research into workspace ergonomics consistently shows that a clean, organized environment reduces stress and allows for deeper focus.
3D printing is the ultimate “bored at work” hobby because it allows you to iterate on your own productivity. You see a problem at 10:00 AM, you slice a solution by 10:15 AM, and by your lunch break, you have a physical object that solves that problem forever.
1. Under-Desk Cable Management Trays
The “spaghetti monster” of cables under your desk isn’t just ugly—it’s a dust magnet and a trip hazard. Commercial cable trays often cost $20–$40 and require specific mounting hardware. A 3D-printed modular bracket system is superior because you can size it exactly to your power strip and cable volume.
- The Problem: Excess cable length hanging in the leg-well or bunching up behind the desk.
- The Solution: Interlocking J-hooks or a modular “spine” that mounts to the underside of the desk.
- Print Settings: 3–4 walls/perimeters for strength, 15% gyroid infill.
- Estimated Cost: $0.45 (approx. 22g of filament).
- Search for: “Modular Under-Desk Cable Tray” or “J-Hook Cable Manager.”
2. The Gridfinity System
Created by Zack Freedman, Gridfinity is the “open-source standard for desk organization.” It’s a grid-based system where every bin, pen holder, and SD card tray locks into a baseplate. Once you print your first baseplate, you’ll never look at a drawer the same way again. You can find the full collection of Gridfinity files on Printables and Thangs.
- The Problem: “Junk drawers” where batteries, paperclips, and thumb drives live in a chaotic soup.
- The Solution: A 4x4 or 5x5 grid baseplate and custom-sized bins for every specific tool you use.
- Print Settings: 0.28mm layer height (speed over detail), 2 walls, 5% infill.
- Estimated Cost: $0.10 per bin, $0.30 per baseplate.
- Search for: “Gridfinity Baseplate” and “Gridfinity Pen Holder.”
3. Vertical Laptop Stand
If you use an external monitor, your laptop is likely taking up 20% of your desk surface for no reason. A vertical stand lets you tuck the laptop behind your monitor or off to the side, reclaiming that space for your coffee, a notebook, or just breathing room.
- The Problem: Desktop real estate “rented” by a device that is currently acting as a desktop PC.
- The Solution: A weighted or screw-mounted vertical slot.
- Print Settings: 4 walls, 25% infill. Use a brim if your bed adhesion is weak, as these are often tall prints.
- Estimated Cost: $0.80 (approx. 40g of filament).
- Search for: “Adjustable Vertical Laptop Stand.”
4. Under-Desk Headphone Hanger
Headphones are bulky. Putting them on your desk takes up space; putting them under your desk via a printed hook keeps them within reach but invisible when not in use.
- The Problem: Large over-ear headphones cluttering the desk surface or getting knocked over.
- The Solution: A wide-arc hook that prevents “denting” the headband foam over time.
- Print Settings: Print on its side for maximum strength (long layer lines). 3 walls.
- Estimated Cost: $0.25.
- Search for: “Under-desk Headphone Mount.”
5. Mechanical Switch Fidget / Tester
This is the ultimate “boredom at work” print. If you have spare mechanical keyboard switches, printing a small base creates a haptic, satisfying fidget toy that is significantly more professional-looking than a plastic spinner.
- The Problem: The need to fidget during long Zoom calls without looking like you’re playing with a toy.
- The Solution: A 2x2 or 3x3 switch tester block.
- Print Settings: High detail (0.12mm or 0.16mm layer height) for a nice finish.
- Estimated Cost: $0.15.
- Search for: “Mechanical Switch Tester Fidget.”
6. SD Card & USB Drive “Toaster”
If you’re a photographer, videographer, or just a tech enthusiast, you have too many small storage devices. A “toaster” style holder keeps them upright and labeled, rather than rattling around in a drawer.
- The Problem: Losing tiny SD cards or spending 30 seconds searching for the right USB drive.
- The Solution: A tiered holder with slots for SD, MicroSD, and USB-A/C.
- Print Settings: 0.2mm layer height, 10% infill.
- Estimated Cost: $0.20.
- Search for: “SD Card Toaster” or “USB Drive Organizer.”
7. Custom Phone/Tablet Stand (with Charging Port)
Most cheap phone stands block the charging port at the bottom. A 3D-printed version can be designed with a specific “channel” for your cable, allowing you to use your phone as a secondary “slack” or “calendar” screen while it charges.
- The Problem: Phone stands that force the cable to bend at an awkward 90-degree angle.
- The Solution: A high-clearance stand with a cable management cutout.
- Print Settings: 3 walls, 15% infill.
- Estimated Cost: $0.40.
- Search for: “Parametric Phone Stand.”
8. Cable “Drops” and Clips
Stop your charger from falling behind the desk every time you unplug your laptop. These are 10-minute prints that you can scatter around your workspace to ensure every cable has a “dock.”
- The Problem: Diving under the desk every time you need to charge your phone.
- The Solution: Small, adhesive-backed (use 3M Command strips) cable clips.
- Print Settings: 100% infill (they are so small that the time difference is negligible).
- Estimated Cost: $0.02 per clip.
- Search for: “Cable Drop” or “Desk Edge Cable Clip.”
9. Monitor Riser / Shelf (Small)
While a full-width riser might be too large for some printers, printing four modular “legs” and using a piece of scrap wood (or a printed interlocking shelf) can raise your monitor to eye level, saving your neck.
- The Problem: Poor ergonomics leading to neck strain after 8 hours of work.
- The Solution: Height-adjustable riser legs.
- Print Settings: 5+ walls for load-bearing capacity. 30% infill.
- Estimated Cost: $0.95 (for 4 legs).
- Search for: “Modular Monitor Riser Legs.”
10. Webcam Privacy Shutter
If your webcam doesn’t have a built-in slider, don’t use a piece of ugly tape. A small, clip-on privacy shutter looks professional and gives you peace of mind that you aren’t “live” when you think you’re alone.
- The Problem: Privacy concerns and the “ugly tape” solution.
- The Solution: A sliding or flip-down plastic cover.
- Print Settings: 0.12mm layer height for tight tolerances.
- Estimated Cost: $0.05.
- Search for: “Logitech C920 Privacy Cover” (or search for your specific model).
Technical Guide: Materials and Calibration
To make these upgrades look like “products” rather than “3D prints,” you need to pay attention to three things: Material, Tolerance, and Post-Processing.
Material Choice: PLA vs. PETG vs. TPU
For 90% of desk upgrades, PLA (Polylactic Acid) is king. It’s the easiest to print, comes in every color imaginable (Matte Black or Grey is best for a “pro” look), and is rigid enough for drawers and stands.
However, if you are printing the Under-Desk Cable Trays or the Headphone Hanger, consider PETG. It has more “flex” before it snaps, making it less likely to shatter if you accidentally kick it under the desk.
TPU (Flexible) is great for the Cable Drops or any part that needs to “grip” a cable without scratching it.
Calibration for “Click-Fit” Parts
When printing things like Gridfinity bins or the Webcam shutter, your printer’s X/Y Hole Compensation matters. If your bins don’t fit in the grid, you likely have “elephant’s foot” (where the first layer is squished too wide).
- Pro Tip: Use a “0.2mm Initial Layer Expansion” setting in Cura or OrcaSlicer to ensure your parts fit together perfectly on the first try.
Post-Processing for a Professional Look
Don’t settle for the “shiny plastic” look.
- Textured PEI Sheets: Print on a textured bed to give the visible surface a professional, matte “powder-coated” texture.
- Deburring Tool: Spend $10 on a deburring tool to clean up the edges of your prints. It makes a world of difference in how they feel in your hand.
- Matte Filament: Brands like PolyTerra or Hatchbox Matte provide a finish that hides layer lines almost entirely.
Conclusion: The ROI of a 3D-Printed Office
When you add up the cost of these 10 items, the total filament usage is less than 250g—about a quarter of a standard $20 spool. For $5.00 in plastic, you can replace over $150 worth of branded desk accessories.
But the real “return on investment” isn’t the money saved; it’s the friction removed. When every tool has a home and every cable is routed, you stop fighting your environment and start working in it.
What’s the most useful thing you’ve printed for your desk? Let us know or share your setup! Find more free models to print on Printables, Thingiverse, and Thangs.
New to the hobby? Check out our Best 3D Printers Under $300 guide to find the machine that will build your next upgrade.
Related Articles
10 Things You Should 3D Print First (New Printer)
Just unboxed your first 3D printer? Skip the dust-collectors — here are 10 functional prints that upgrade your desk and workflow.
15 Must-Have 3D Printing Accessories for Every Maker
The 15 best 3D printing accessories from calipers and scrapers to deburring tools, filament dryers, and fire safety. The complete maker's toolkit.
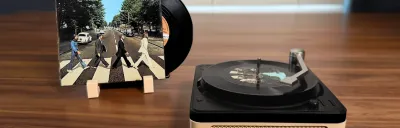
RFID Record Player: Play Spotify with Physical Vinyl
Build an RFID Record Player that plays Spotify with physical vinyl cards. A complete DIY guide using Raspberry Pi, NFC tags, and 3D printing.