15 Must-Have 3D Printing Accessories for Every Maker
The 15 best 3D printing accessories from calipers and scrapers to deburring tools, filament dryers, and fire safety. The complete maker's toolkit.
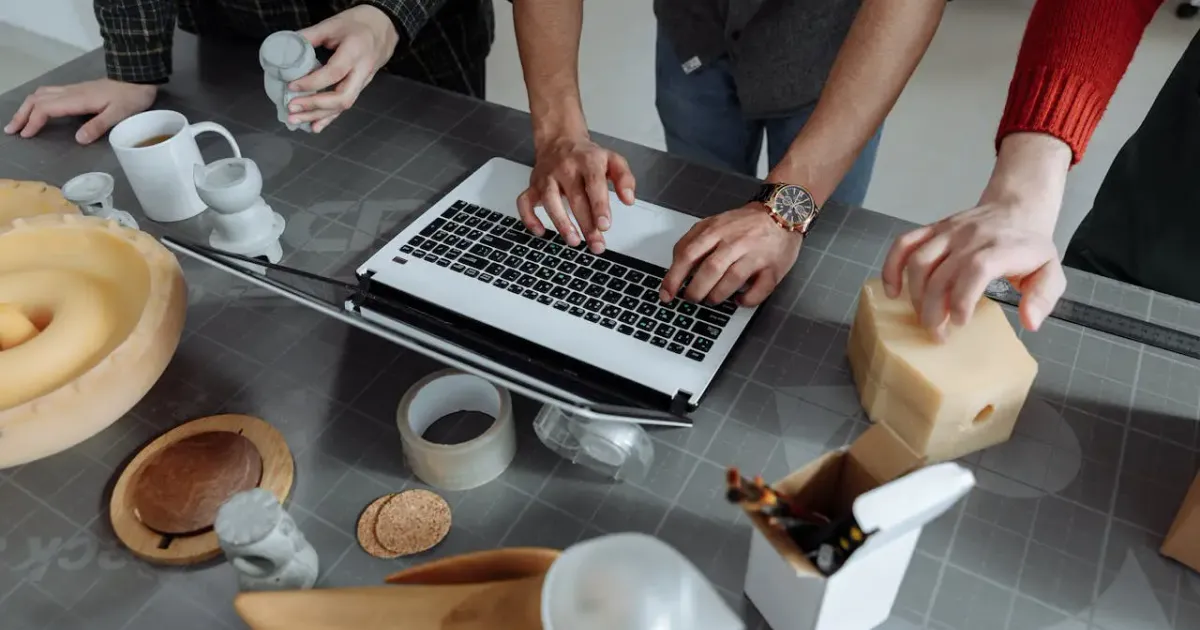

If you’ve been following our 3D Printing Beginner Guide, you know that the printer is just the engine. To get professional results, you need the right tools in your pit crew.
This is the definitive list of 3D printing accessories, categorized from “Day One Essentials” to “Advanced Maker Hacks.”
Part 1: The “Day One” Essentials
1. Digital Calipers: The Precision King
If you’re designing your own parts or even just verifying the accuracy of a downloaded model, digital calipers are non-negotiable.
- Pro Tip: Use them to measure your filament diameter in three different spots and average it. Put this number into your slicer’s “Filament Diameter” setting for more accurate extrusion.
2. Flush Cutters (The “Blue” Pliers)
Most printers come with a cheap pair of side cutters, but a high-quality pair of flush cutters is a game changer for support removal.
- Pro Tip: Use these to cut your filament at a 45-degree angle. This “pointy” end makes it much easier to feed through the extruder and Bowden tubes.
3. Isopropyl Alcohol (IPA) and Microfiber Cloths
Adhesion is the number one cause of failed prints. Keep a spray bottle of 90%+ Isopropyl Alcohol and a clean microfiber cloth handy to wipe down your build plate before every single print.
- Pro Tip: For PEI sheets, if IPA isn’t working, give the plate a wash with warm water and basic dish soap (like Dawn). It’s the ultimate “reset” for build surface adhesion.
4. Thin Metal Scraper
Essential for gently prying prints loose without damaging the bed.
- Pro Tip: If a print is truly stuck, put the build plate into the freezer for 10 minutes. The different contraction rates of plastic and metal will cause the print to “pop” off on its own.
Part 2: The Post-Processing Toolkit
5. Deburring Tool: The Secret Weapon
This is the tool most beginners miss. A deburring tool has a swiveling curved blade that you run along the edges of a print to remove “elephant’s foot” and smooth out sharp edges in seconds.
- Pro Tip: Use it on the inside of 3D-printed holes to help bolts and rods fit perfectly without needing to drill them out.
6. Butane Torch (The Stringing Killer)
A quick, one-second pass with a butane torch will vaporize wispy “hairs” (stringing) without damaging the main model.
- Pro Tip: Move fast! It’s a “flick of the wrist” technique. If you linger, you’ll melt the surface or discolor the plastic.
7. Needle Files and Sandpaper
For those high-detail prints, a set of needle files and high-grit sandpaper (400 to 2000 grit) are essential for removing support marks and smoothing transitions.
- Maker Hack: Wet sanding (sanding while the print and paper are wet) prevents the plastic from melting due to friction heat and keeps the dust down.
8. 3D Printing Pen
Think of this as a “surgical welder.” A 3D printing pen allows you to fill in gaps, weld separate pieces together, or fix small failures without reprinting the whole model.
- Pro Tip: Use the same filament as your print for an invisible structural bond.
Part 3: Performance & Reliability Upgrades
9. Silicone Socks for the Hotend
A tiny, cheap silicone sock keeps your heater block clean and insulates it, leading to more stable temperatures and preventing “blob of doom” disasters.
- Pro Tip: It also prevents the cooling fan from accidentally cooling the heater block, which can cause “Thermal Runaway” errors.
10. Filament Dry Box or Dehydrator
Plastic absorbs moisture from the air, causing “popping” sounds and terrible surface quality. A filament dryer is essential if you print PETG, TPU, or Nylon.
- Maker Hack: You can 3D print your own dry boxes using IKEA Samla bins and some 3D-printed rollers.
11. Patterned Build Plates (PEO/H1H/PEY)
Want your prints to look premium? These aftermarket plates leave beautiful, holographic or carbon-fiber patterns on the bottom of your prints.
- Pro Tip: These plates are perfect for flat objects like coasters or the bottom of the RFID Record Player enclosure.
12. Nozzle Cleaning Kit (Acupuncture Needles)
A set of 0.4mm stainless steel needles allows you to clear out partial clogs from the bottom without taking the hotend apart.
- Pro Tip: Perform a “cold pull” (the Atomic Method) periodically to pull out charred plastic from inside the nozzle.
Part 4: Safety & Peace of Mind
13. Automatic Fire Extinguisher Ball
If you run long prints overnight, an Elide Fire Ball or similar automatic extinguisher mounted above the printer provides an extra layer of safety.
- Safety Tip: Never leave a printer unattended without at least a working smoke detector in the room.
14. Smart Plug with Power Monitoring
Pair your printer with a Smart Plug. If you see a print failing on your webcam, you can kill the power remotely from your phone.
- Pro Tip: Set up an automation to turn off the printer once the power draw drops below a certain wattage for 10 minutes (indicating the print is finished).
15. High-Intensity LED Work Light
Most built-in printer lights are mediocre. A bright, magnetic LED light allows you to spot first-layer issues before they ruin a 24-hour print.
Build Your Toolkit by Budget
You don’t need to buy all 15 of these on day one. Here’s a practical staged approach based on what you actually need versus what’s nice to have.
The $50 Starter Kit
If you just bought your first printer, this is the bare minimum to print successfully and not damage anything:
- Digital calipers ($15)
- Flush cutters ($10)
- 90% IPA + microfiber cloth ($8)
- Thin metal scraper ($5)
- Silicone sock for the hotend ($5 to $8)
- Smoke detector if you don’t have one in the room ($10)
That’s everything you need to print PLA reliably. Skip the rest until you’ve actually run into the problem each tool solves.
The $150 Hobbyist Kit
After your first month or two, add the post-processing and reliability tools that turn rough prints into clean ones:
- Deburring tool ($12)
- Needle files + sandpaper set ($20)
- Butane torch ($15)
- Nozzle cleaning needles ($8)
- Smart plug with power monitoring ($15)
- Magnetic LED work light ($25)
This is the level where most hobbyists settle. Every tool here pays for itself within a couple of prints.
The $300+ Advanced Kit
Once you start printing engineering materials (PETG, TPU, ABS, ASA, Nylon) or running multi-day prints, the moisture and safety tools become non-negotiable:
- Filament dryer ($60 to $120)
- Patterned aftermarket build plate ($35 to $50)
- 3D printing pen for repairs ($30)
- Automatic fire extinguisher ball ($45)
- Vacuum filament storage bags + desiccant ($25)
- Quality nozzle replacement set (hardened steel, multiple sizes, $40)
If you’re at this point, you’ve probably also outgrown your starter printer. Worth checking our Bambu Lab X2D first look or Bambu A1 Mini vs Creality Ender 3 for the next-step machine that justifies these tools.
Maintenance Schedule: What to Do and When
Tools are only useful if you actually use them. Here’s the calendar most experienced makers settle into.
Every print:
- Wipe build plate with IPA before starting
- Visual check of first layer (use the LED light)
Every 20 to 30 hours of printing:
- Cold pull through the nozzle (Atomic Method) to clear partial clogs
- Check belt tension if you hear unusual noises
- Vacuum or brush dust from fans
Every 100 hours:
- Replace nozzle (or sooner with abrasive filaments like carbon fiber or glow-in-the-dark)
- Lubricate linear rails with PTFE-based grease
- Wash build plate with dish soap and warm water (full reset)
Monthly:
- Inspect Bowden tube for filament dust or cracking
- Check that the silicone sock isn’t torn or full of plastic blobs
- Run a temperature tower for any new filament you’ve started using
Quarterly:
- Calibrate e-steps if your prints are over- or under-extruding
- Bake any opened filament in the dryer for a full cycle (especially PETG, TPU, Nylon)
- Review your printer’s firmware for updates
This sounds like a lot, but most of it takes 5 minutes once it becomes habit. The tools above make every step faster.
Ready to level up?
Now that your workshop is fully equipped, why not test your skills on a complex project like the Sesame Robot Quadruped? Or, if you’re still looking for the perfect machine, check out our Bambu A1 Mini vs Creality Ender 3 comparison to see which hardware works best with these tools. And if you have a one-off project that doesn’t justify buying a printer, our JUSTWAY on-demand review covers the alternative.
Happy printing!
For more insights, check out our guide on productivity.
Related Articles
What Should I 3D Print First? 25 Beginner Projects
Your first 3D print is coming up? Here are 25 perfect beginner projects from test prints to practical objects - sorted by difficulty level.
20 Best Functional 3D Prints That Are Actually Useful (2026)
Skip the toys, these 20 functional 3D prints solve real problems at your desk, home, and tech setup. Print times, difficulty, and STL sources included.

How Much Does 3D Printing Cost? Complete Breakdown (2026)
What does 3D printing actually cost? Full breakdown of printer prices, filament, electricity, and hidden costs with real examples and honest math.