FDM vs Resin 3D Printing: Which One Should You Choose?
FDM vs resin 3D printing — we compare cost, print quality, safety, and ease of use with real examples to help you pick the right technology for your project.
So you’ve decided to get into 3D printing. You start researching and immediately hit a fork in the road: FDM or resin?
Both technologies create 3D objects layer by layer, but that’s where the similarities end. They use different materials, produce different results, and require completely different workflows.
Here’s everything you need to know to choose the right one.
Quick Comparison
| Factor | FDM | Resin (SLA/MSLA) |
|---|---|---|
| Print Quality | Good (visible layer lines) | Excellent (smooth, detailed) |
| Build Volume | Large (often 220x220x250mm+) | Small (usually 130x80x150mm) |
| Material Cost | $20-30/kg | $30-50/L |
| Material Safety | Safe (PLA is non-toxic) | Toxic until cured |
| Post-Processing | Minimal | Washing + UV curing required |
| Ease of Use | Beginner-friendly | Moderate learning curve |
| Best For | Functional parts, large prints | Miniatures, jewelry, dental |
| Printer Cost | $200-500 (good quality) | $200-400 (good quality) |
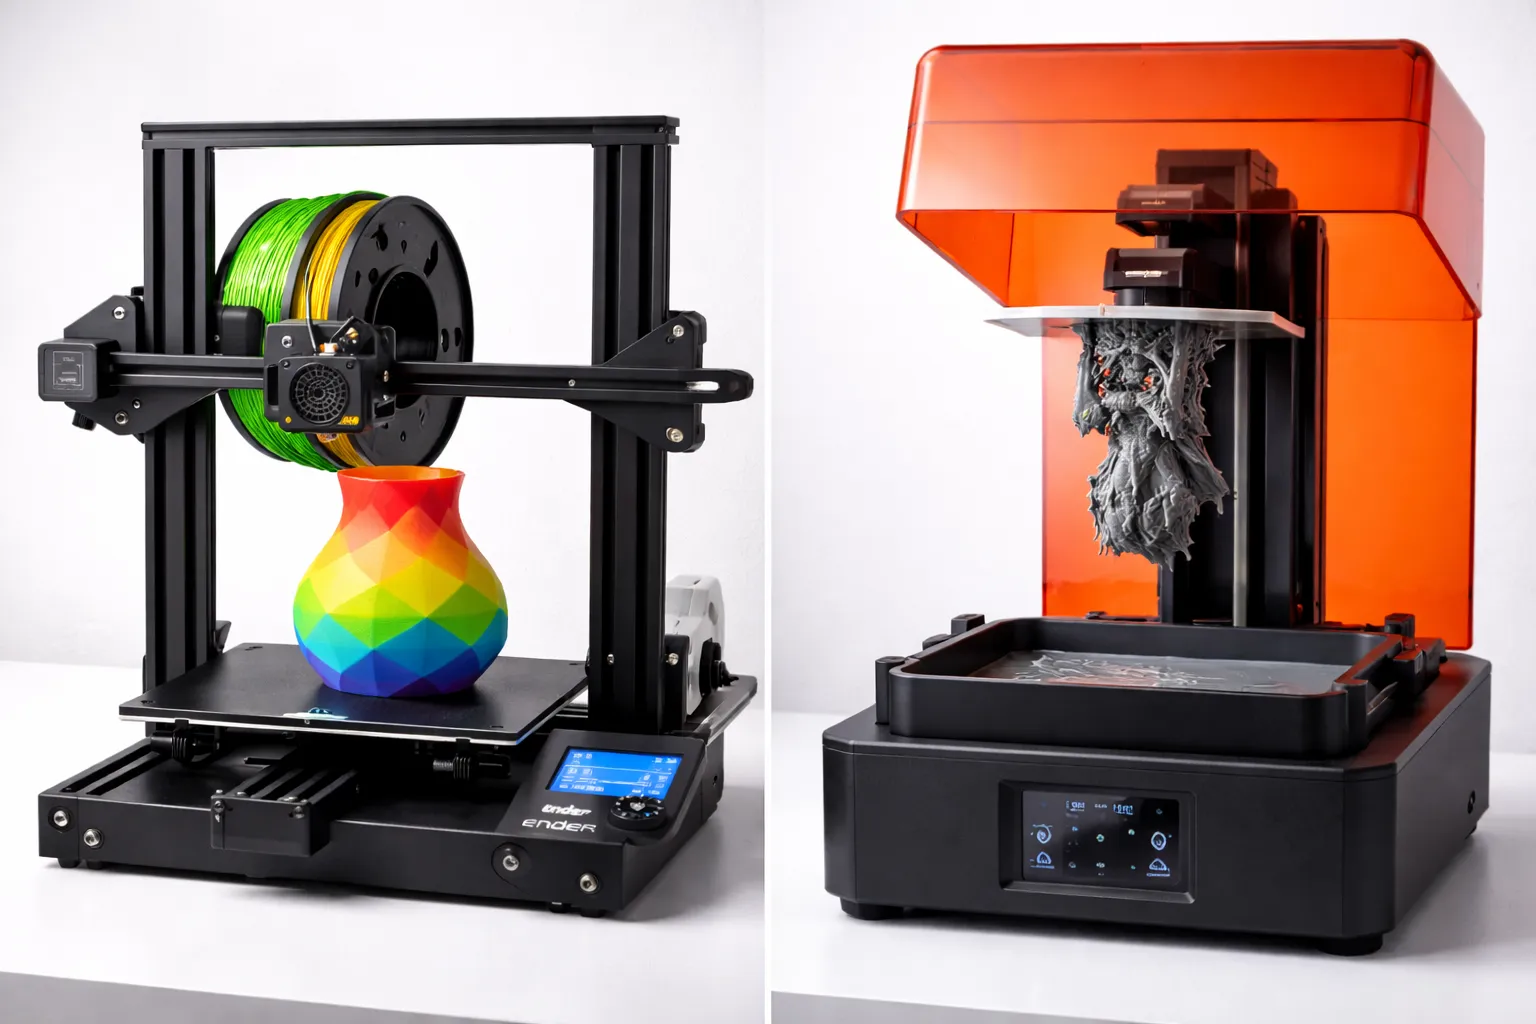
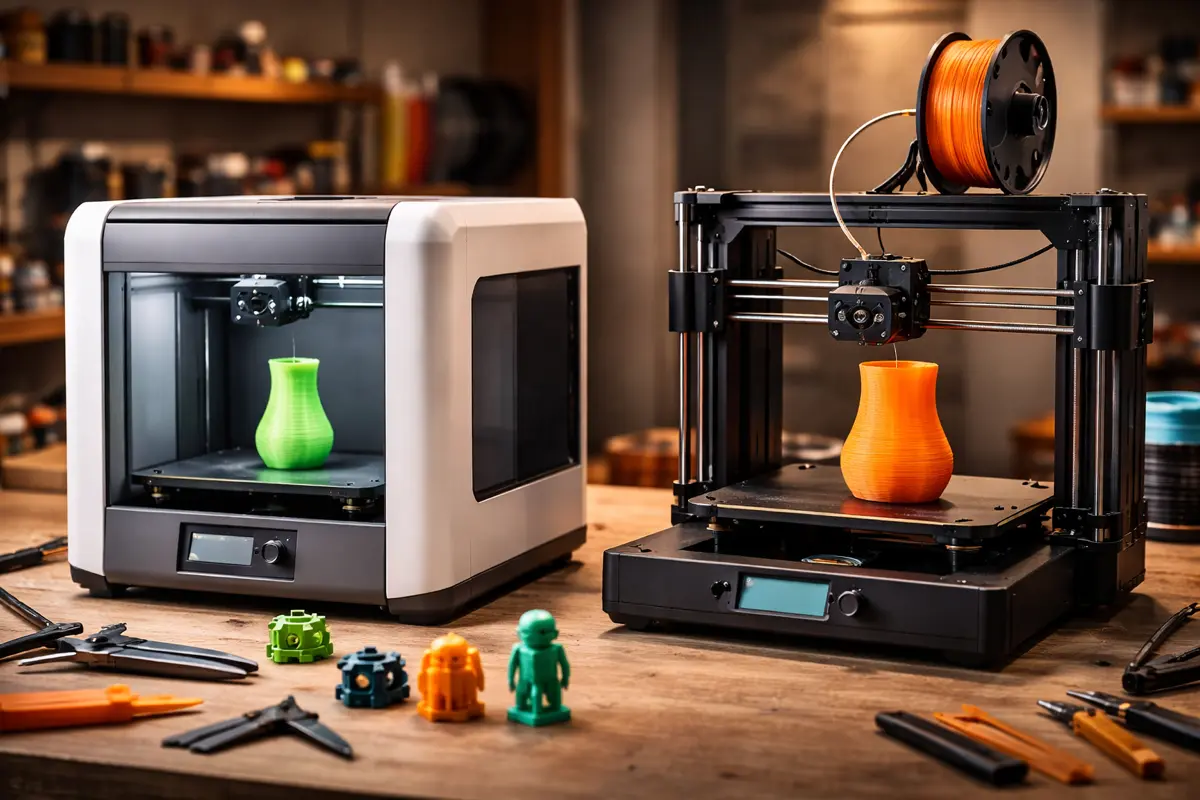
What is FDM Printing?
FDM (Fused Deposition Modeling) melts plastic filament and deposits it layer by layer through a heated nozzle. Think of it like a very precise hot glue gun.
How It Works
- Plastic filament feeds into a heated nozzle (200-260°C)
- Nozzle moves in X/Y while extruding melted plastic
- Build plate moves down (or nozzle up) for each layer
- Layers fuse together as they cool
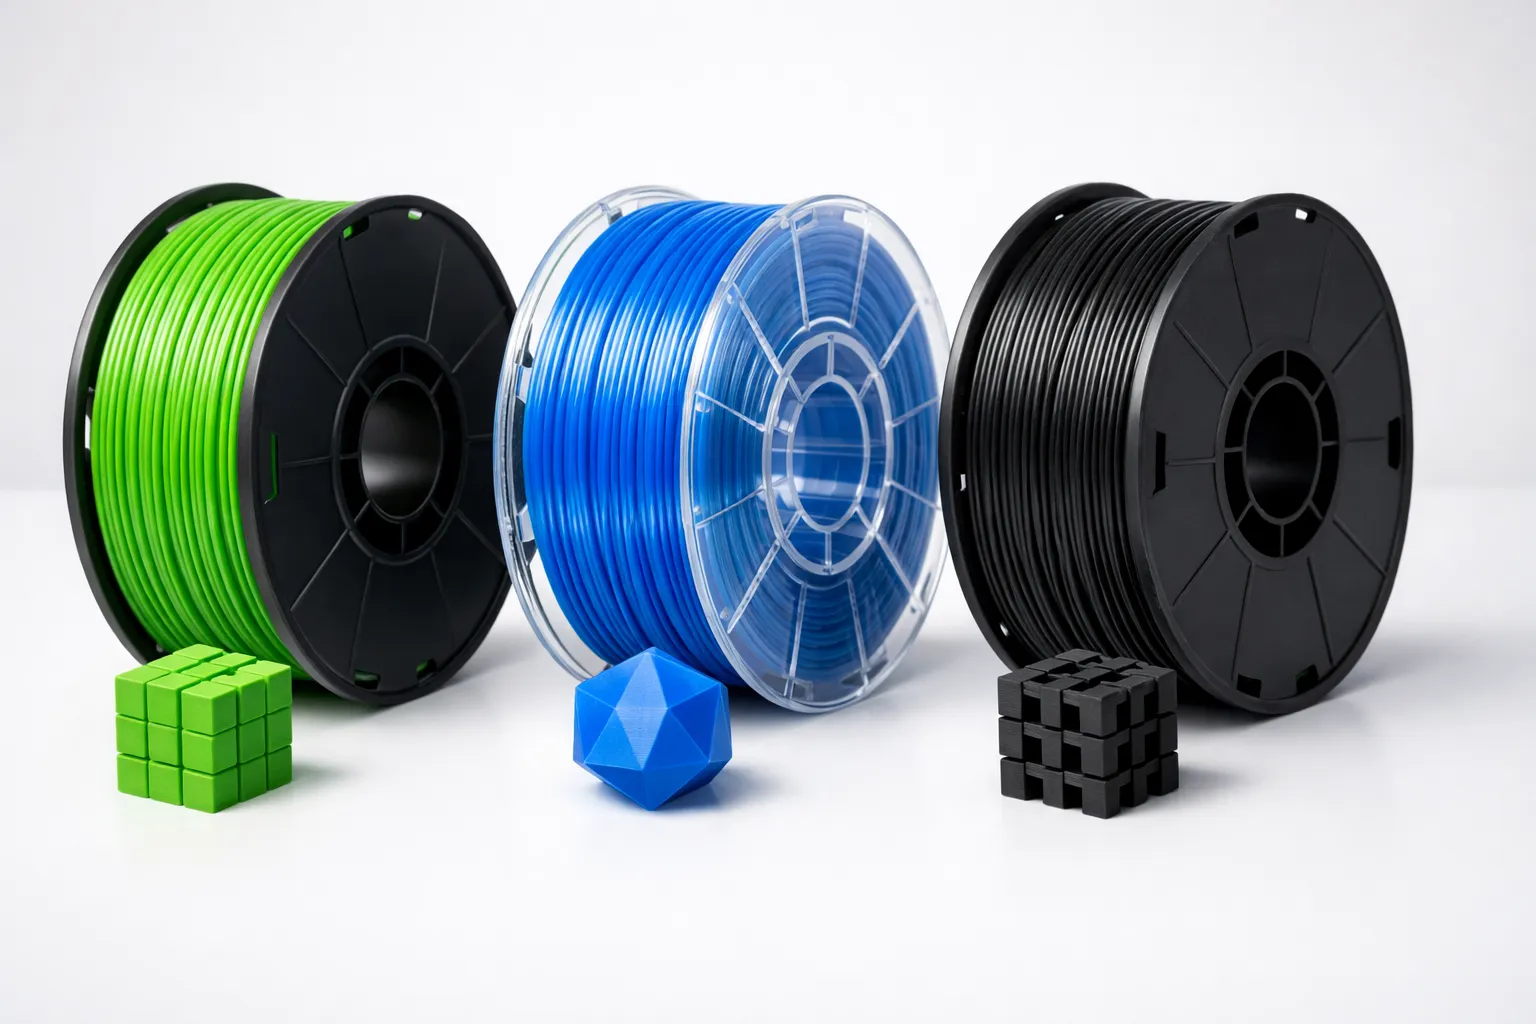
Common FDM Materials
- PLA — Easy to print, biodegradable base, low strength
- PETG — Stronger, more flexible, good all-rounder
- ABS — Heat resistant, strong, requires enclosure
- TPU — Flexible, rubber-like
FDM Pros
✅ Large build volumes — Print big things ✅ Cheap materials — $20-30/kg filament ✅ Safe to use — No toxic chemicals ✅ Easy to learn — Forgiving of mistakes ✅ Strong functional parts — PETG/ABS are genuinely strong ✅ Wide material variety — Wood-fill, metal-fill, carbon fiber ✅ Minimal post-processing — Remove supports, done
FDM Cons
❌ Visible layer lines — Surface texture is obvious ❌ Limited detail — Small features blur together ❌ Supports leave marks — Cleanup can be tedious ❌ Slower for detailed prints — Fine layers = long print times ❌ Warping issues — Especially with ABS (our adhesion troubleshooting guide covers fixes)
What is Resin Printing?
Resin printing (SLA/MSLA/DLP) uses UV light to cure liquid photopolymer resin layer by layer. The print emerges from a vat of liquid resin.
How It Works
- Build plate dips into liquid resin vat
- UV light (laser, LCD screen, or projector) cures one layer
- Build plate lifts, peels cured layer from film
- Process repeats, building upside-down
Types of Resin Printing
- SLA (Stereolithography) — UV laser traces each layer
- MSLA (Masked SLA) — LCD screen masks UV light
- DLP (Digital Light Processing) — Projector flashes entire layer
Most consumer printers are MSLA—they’re cheaper and faster than laser SLA.
Common Resin Types
- Standard resin — Good detail, brittle
- ABS-like resin — More durable, less brittle
- Tough/Flexible resin — Impact resistant
- Water-washable resin — Easier cleanup (no IPA needed)
- Plant-based resin — Lower odor, eco-friendlier
Resin Pros
✅ Incredible detail — Capture tiny features ✅ Smooth surfaces — Almost no visible layers ✅ Fast for small parts — Entire layer cures at once ✅ Perfect for miniatures — Industry standard for tabletop gaming ✅ Excellent for jewelry — Castable resins available
Resin Cons
❌ Toxic materials — Requires safety precautions ❌ Small build volume — Most are under 150mm in each dimension ❌ Post-processing required — Wash, cure, every single print ❌ Messy workflow — Liquid resin gets everywhere ❌ Brittle prints — Standard resin cracks under stress ❌ Consumables add up — IPA, gloves, FEP films, filters ❌ Smell — Even “low odor” resins have a chemical smell ❌ Disposal issues — Can’t pour resin down drains
Print Quality Comparison
FDM Quality
At 0.2mm layer height (standard):
- Layer lines visible on all surfaces
- Small details (under 1mm) are lost
- Supports leave marks that need cleanup
- Top surfaces can have minor artifacts
At 0.1mm layer height (fine):
- Layer lines less visible but still there
- Better small detail retention
- Print time roughly doubles
Best finish: Vertical surfaces look best; top surfaces depend on settings
Resin Quality
At 0.05mm layer height (standard for resin):
- Layers essentially invisible to naked eye
- Captures details under 0.5mm
- Supports leave minimal marks
- Surfaces are smooth by default
Best finish: All surfaces look great; almost injection-molded appearance
Visual Comparison
| Detail Level | FDM | Resin |
|---|---|---|
| Miniature faces | Blobby | Sharp |
| Text under 5mm | Barely readable | Crisp |
| Surface texture | Ribbed | Smooth |
| Thin walls (1mm) | Possible | Easy |
| Overhangs | Need supports, leave marks | Need supports, minimal marks |
Safety Comparison
FDM Safety
Risks: Minimal
- Hot surfaces (nozzle reaches 260°C)
- ABS releases fumes (print in ventilated area)
- Moving parts (keep hands clear)
Precautions:
- Don’t touch hot end during printing
- Ventilate when printing ABS
- Basic common sense
Resin Safety
Risks: Moderate to serious
- Skin contact — Causes irritation, sensitization, allergic reactions
- Eye contact — Severe irritation
- Inhalation — Respiratory irritation, headaches
- Environmental — Toxic to aquatic life
Required precautions:
- Always wear nitrile gloves (latex doesn’t protect against resin)
- Safety glasses when pouring/handling resin
- Ventilated area or fume extraction
- Never pour liquid resin down drains — Cure with UV first
- Clean spills immediately with IPA
- Dedicated workspace away from food/living areas
The reality: Many people print resin in spare rooms or garages without issues, but you MUST follow safety protocols. Resin allergies can develop over time with repeated exposure.
Cost Comparison
Initial Investment
| Item | FDM | Resin |
|---|---|---|
| Printer | $200-400 | $200-400 |
| Materials to start | $25 (1kg PLA) | $60 (1L resin + IPA) |
| Safety gear | — | $20 (gloves, glasses) |
| Curing station | — | $40-80 |
| Total | ~$250 | ~$350 |
Ongoing Costs (per month, casual use)
| Item | FDM | Resin |
|---|---|---|
| Material | $20-40 | $30-60 |
| IPA | — | $15 |
| Gloves | — | $10 |
| FEP film replacement | — | $10 |
| Total | $20-40 | $65-95 |
The verdict: FDM is significantly cheaper to buy AND operate.
Workflow Comparison
FDM Workflow
- Slice model in Cura/PrusaSlicer
- Transfer file to printer (USB/WiFi/SD)
- Print (30 min to 20+ hours)
- Remove from bed
- Remove supports (if any)
- Done
Total hands-on time: 5-15 minutes
Resin Workflow
- Slice model in Chitubox/Lychee
- Transfer file to printer
- Print (1-8 hours typically)
- Remove from build plate (careful—dripping resin)
- Wash in IPA (3-6 minutes in wash station)
- Dry
- Remove supports
- UV cure (5-15 minutes in cure station)
- Final cleanup
- Dispose of used IPA properly (cure and evaporate)
Total hands-on time: 20-40 minutes
The Hidden Time Cost
Resin printing doesn’t just take more hands-on time—it takes more mental energy. You can’t just walk away from fresh resin prints. Every print requires a multi-step post-processing routine.
FDM? Pop it off the bed, snap off supports, done.
Best Use Cases
Choose FDM For:
- Functional parts — Brackets, enclosures, tools
- Large prints — Cosplay helmets, vases, decorations
- Prototyping — Quick iterations, size checks
- Everyday printing — Phone stands, organizers, hooks (see 10 things to print first)
- Outdoor items — PETG/ASA handle weather
- Beginners — Easier, safer, more forgiving
Choose Resin For:
- Miniatures — D&D figures, Warhammer, dioramas (find models at best sites for free 3D models)
- Jewelry — Rings, pendants (castable resin)
- Dental/Medical — Dental models, surgical guides
- Tiny detailed parts — Watch components, model kit details
- Display pieces — Statues, busts, figurines
- Professional prototypes — When finish matters
Can You Have Both?
Absolutely. Many serious makers run both:
- FDM for functional parts, large prints, quick prototypes
- Resin for detailed miniatures, display pieces, fine work
They complement each other perfectly. The cost of a decent resin printer ($200-300) isn’t prohibitive if you already have FDM experience and know you want finer detail.
My recommendation: Start with FDM. Learn the basics of 3D printing without safety concerns and expensive consumables. After 3-6 months, if you find yourself wanting finer detail, add a resin printer.
Popular Printers in Each Category
FDM Recommendations
| Budget | Printer | Price |
|---|---|---|
| Entry | Creality Ender 3 V3 SE | ~$200 |
| Mid-range | Bambu Lab A1 Mini | ~$220 |
| Enthusiast | Bambu Lab P1S | ~$400 |
| Premium | Prusa MK4S | ~$670 (kit) |
For detailed reviews and comparisons, see our best 3D printers under $300 guide.
Resin Recommendations
| Budget | Printer | Price |
|---|---|---|
| Entry | Elegoo Mars 4 | ~$170 |
| Mid-range | Anycubic Photon Mono M5s Pro | ~$460 |
| Large format | Elegoo Saturn 4 | ~$320 |
| Premium | Formlabs Form 4 | ~$3,500 |
Conclusion
Choose FDM if:
- You’re a beginner
- You want functional, strong parts
- You need large prints
- You prefer simple, safe workflows
- Budget is a concern
Choose Resin if:
- You need ultra-fine detail
- You’re printing miniatures or jewelry
- Surface finish is critical
- You’re comfortable with chemical safety
- You have a dedicated, ventilated workspace
For most beginners: Start with FDM. It’s easier, safer, and cheaper. You can always add resin later.
For miniature painters: Go straight to resin. FDM can’t match the detail you need.
For everyone else: FDM handles 90% of use cases. Resin is a specialty tool for when you need it.
Now go print something.
Want to learn more? Check out the 3D Printing Guide for all our 3D printing content, or read the 3D Printing Beginner Guide to get started.
Ready to start? Check out 3D Printing for Beginners: Complete Guide, learn about PLA vs PETG vs ABS materials, or get your slicer set up with Cura Settings for Beginners.
Related Articles
Best 3D Printers Under $300 (2026 Buying Guide)
Best 3D printer under $300 for beginners? We compare Bambu Lab A1 Mini, Creality Ender 3 V3, Anycubic Kobra, and more with real specs.
Bambu Lab A1 Mini vs. Creality Ender 3: Which Printer for Beginners?
Bambu Lab A1 Mini or Creality Ender 3 V3? The ultimate comparison of the two most popular beginner 3D printers in 2026 with all pros and cons.
PLA vs PETG vs ABS: Which 3D Printing Filament Should You Use?
Confused about filament types? We compare PLA, PETG, and ABS for strength, ease of use, and best applications to help you choose the right material.