
The 10 Cura Settings That Actually Change Your Prints
Cura ships with over 400 settings. These are the ten that move the needle on quality, what each one does, and the values to start from on your first prints.

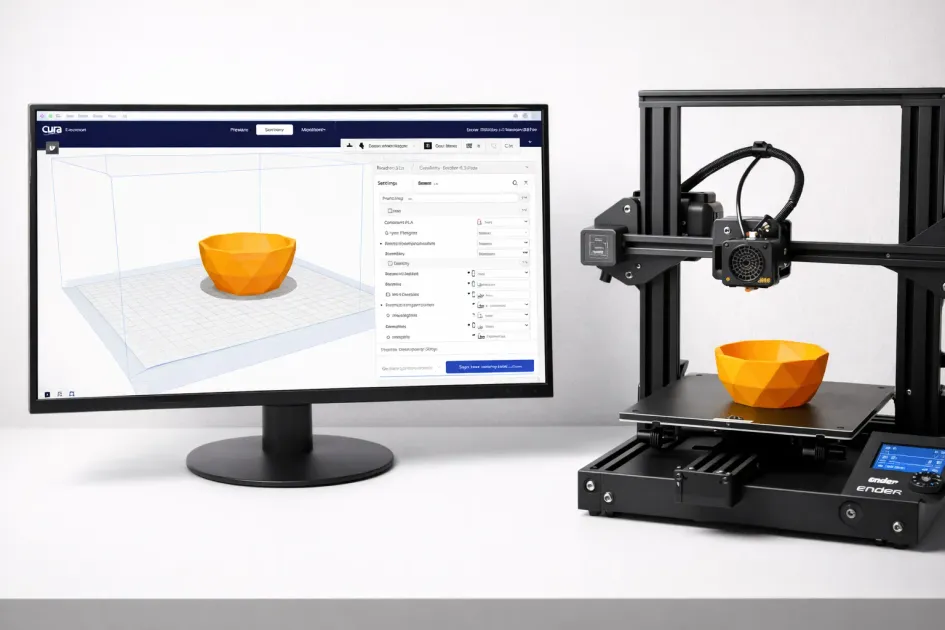
Start here: 0.2 mm layer height, 2 walls, 20 percent infill, 50 mm/s print speed with the first layer at 25 mm/s, and retraction left at Cura’s default. Those values cover about 95 percent of prints on a stock printer, and every other setting in this guide is a refinement of them. Cura ships with more than 400 settings; you will change ten.
You downloaded UltiMaker Cura, opened it up, and immediately saw 400+ settings staring back at you. Layer height, wall thickness, infill density, flow rate, retraction distance, coasting, combing, z-hop…
Take a breath. You don’t need most of these.
In this guide, I’ll show you the 10 settings that actually matter for 95% of prints, explain what they do in plain English, and give you starting values that work.
Why Cura Has So Many Settings
Cura is used by everyone from hobbyists printing Pokémon figures to engineers prototyping aerospace parts. All those settings exist for edge cases and fine-tuning.
The truth: Most settings have sensible defaults. You only need to touch about 10 of them regularly.
Let’s focus on those.
Setting Up Cura (First Time)
When you first open Cura:
- Add your printer, Select your printer model from the list (or “Custom FFF” if not listed)
- Choose a profile, Start with “Standard Quality” (0.2mm layer height)
- Select your material, Pick “Generic PLA” to start
That’s it. Cura now has reasonable defaults for your setup.
The 10 Settings That Actually Matter
1. Layer Height (0.12mm - 0.28mm)
What it does: Controls the thickness of each horizontal layer.
| Layer Height | Quality | Print Time | Best For |
|---|---|---|---|
| 0.12mm | High detail | Slow | Miniatures, detailed models |
| 0.2mm | Good balance | Medium | Most prints |
| 0.28mm | Visible layers | Fast | Prototypes, functional parts |
Recommendation: Start with 0.2mm. It’s the universal sweet spot.
Pro tip: Your layer height should be 25-75% of your nozzle diameter. For a standard 0.4mm nozzle, that’s 0.1mm to 0.3mm.
2. Line Width (0.4mm default)
What it does: Controls how wide each extruded line is.
Recommendation: Leave at 0.4mm (or your nozzle diameter). Only change this for specific calibration needs.
3. Wall Line Count (2-4 walls)
What it does: Sets how many outer perimeter lines surround your print.
| Wall Count | Strength | Print Time | Best For |
|---|---|---|---|
| 2 walls | Low | Fast | Decorative items |
| 3 walls | Medium | Medium | General use |
| 4+ walls | High | Slow | Functional/mechanical parts |
Recommendation: 3 walls for most prints. Increase to 4 for anything structural.
Why it matters: Walls contribute more to strength than infill. A 3-wall print with 15% infill is often stronger than a 2-wall print with 50% infill.
4. Infill Density (15-50%)
What it does: Controls how much internal structure fills your print.
| Infill % | Use Case |
|---|---|
| 0-10% | Decorative only |
| 15-20% | Standard prints |
| 30-40% | Functional parts |
| 50%+ | Maximum strength (diminishing returns) |
Recommendation: 20% for most prints. Only go higher for parts under mechanical stress.
Infill Pattern
Cura offers many patterns. Here’s what matters:
| Pattern | Strength | Print Time | Best For |
|---|---|---|---|
| Grid | Good all-around | Medium | General purpose |
| Cubic | Good in all directions | Medium | Functional parts |
| Gyroid | Excellent | Slower | Flexible/organic parts |
| Lines | Weak | Fast | Quick prototypes |
Recommendation: Grid or Cubic for most prints.
5. Printing Temperature (190-220°C for PLA)
What it does: Controls how hot the nozzle gets.
Starting points by material:
| Material | Nozzle Temp | Notes |
|---|---|---|
| PLA | 200-210°C | Start at 205°C |
| PETG | 230-245°C | Start at 235°C |
| ABS | 240-260°C | Start at 245°C |
Recommendation: Start at the middle of your filament’s recommended range (printed on the spool).
Signs of wrong temperature:
- Too hot: Stringing, drooping, blobs
- Too cold: Poor layer adhesion, under-extrusion, clogging
6. Bed Temperature (0-110°C)
What it does: Heats the build plate to help adhesion and prevent warping.
| Material | Bed Temp |
|---|---|
| PLA | 50-60°C (or 0°C with good adhesion) |
| PETG | 70-80°C |
| ABS | 90-110°C |
Recommendation: 60°C for PLA. Adjust if you have adhesion issues.
7. Print Speed (40-80mm/s)
What it does: Controls how fast the print head moves while extruding.
| Speed | Quality | Print Time |
|---|---|---|
| 30-40mm/s | High detail | Slow |
| 50-60mm/s | Good balance | Medium |
| 70-100mm/s | Lower quality | Fast |
Recommendation: 50mm/s for beginners. Speed up once you’re getting consistent results.
Related Speed Settings
- First Layer Speed: 20-25mm/s (slower = better adhesion)
- Wall Speed: 25-40mm/s (slower = better surface quality)
- Infill Speed: 60-80mm/s (can be faster, it’s hidden inside)
- Travel Speed: 150-200mm/s (non-printing moves)
Beginner tip: Just set the main “Print Speed” and let Cura calculate the rest automatically.
8. Supports (Only When Needed)
What it does: Generates temporary structures under overhangs.
When to use supports:
- Overhangs greater than 45-50 degrees
- Bridges longer than 50mm
- Floating parts with nothing underneath
When to skip supports:
- Overhangs under 45 degrees
- Well-designed models (most are designed to print without supports)
- Parts where support marks are unacceptable
Support Types
| Type | Pros | Cons |
|---|---|---|
| Normal | Simple, reliable | Harder to remove, leaves marks |
| Tree | Easy removal, less scarring | Can fail on complex geometry |
Recommendation: Use Tree Supports when possible. Set “Support Overhang Angle” to 45 degrees (Cura’s default, increase to 50° once you’re confident your printer handles overhangs well).
9. Retraction (Enabled)
What it does: Pulls filament back during travel moves to prevent oozing and stringing.
Key settings:
| Setting | PLA | PETG |
|---|---|---|
| Retraction Distance | 5-6mm (Bowden) / 0.5-2mm (Direct Drive) | Same |
| Retraction Speed | 40-50mm/s | 25-40mm/s |
Recommendation: Keep retraction enabled with default values. Only tweak if you see stringing.
Bowden vs Direct Drive:
- Bowden (tube between motor and hotend): Needs 4-7mm retraction
- Direct Drive (motor on print head): Needs 0.5-2mm retraction (start at 0.5mm)
10. Build Plate Adhesion (Skirt, Brim, or Raft)
What it does: Adds extra material around your print’s base for better bed adhesion.
| Type | What It Does | When to Use |
|---|---|---|
| Skirt | Lines around (not touching) print | Default, primes nozzle |
| Brim | Lines attached to print edge | Small footprint, tall prints |
| Raft | Full platform under print | Warping issues, poor bed |
Recommendation:
- Skirt (3-5 lines) for most prints
- Brim (8mm) for tall/thin prints
- Raft only as last resort (wastes material, leaves rough bottom)
Cooling (Bonus Setting)
What it does: Controls the part cooling fan that solidifies freshly extruded plastic.
| Material | Fan Speed |
|---|---|
| PLA | 100% |
| PETG | 30-50% |
| ABS | 0-20% |
Recommendation: 100% for PLA (after first few layers). This prevents drooping and improves overhangs.
My Recommended Starter Profile for PLA
Copy these into Cura for a reliable starting point:
Layer Height: 0.2mmLine Width: 0.4mmWall Count: 3Top/Bottom Layers: 4Infill: 20%Infill Pattern: Cubic
Printing Temp: 205°CBed Temp: 60°C
Print Speed: 50mm/sFirst Layer Speed: 25mm/sTravel Speed: 150mm/s
Retraction: EnabledRetraction Distance: 5mm (Bowden) / 0.5mm (Direct Drive)Retraction Speed: 45mm/s
Cooling: 100% (after layer 4)
Support: Off (enable only when needed)Adhesion: Skirt (3 lines)
Settings to Ignore (For Now)
These settings exist but you don’t need them as a beginner:
- Flow Rate, Only adjust if you’ve done flow calibration
- Coasting, Edge case for stringing
- Combing, Travel path optimization
- Z-Hop, Lifting nozzle during travel
- Ironing, Smoothing top surfaces (useful but advanced)
- Fuzzy Skin, Textured surfaces (cosmetic)
- Adaptive Layers, Variable layer height
- Tree Supports, Already covered
Learn the basics first. These exist for specific problems.
Troubleshooting Common Issues
Stringing
- Increase retraction distance (+1mm)
- Lower print temperature (-5°C)
- Enable “Combing Mode: Within Infill”
First Layer Not Sticking
- Level your bed
- Decrease nozzle-to-bed distance
- Increase bed temp (+5°C)
- Slow first layer speed (20mm/s)
- Add a brim
Layer Separation
- Increase print temperature (+5-10°C)
- Decrease cooling fan speed
- Check for drafts near printer
Warping
- Increase bed temperature
- Add a brim or raft
- Use an enclosure
- Check for drafts
Under-Extrusion
- Increase print temperature
- Check for clogged nozzle
- Verify filament diameter setting
- Calibrate e-steps (advanced)
Save Your Profile!
Once you find settings that work:
- Click the profile dropdown
- Select “Create profile from current settings”
- Name it something useful (“PLA_MyPrinter_0.2mm”)
Now you can always return to known-good settings.
Conclusion
Cura’s 400+ settings exist for good reason, but you don’t need most of them. Focus on these 10:
- Layer Height, 0.2mm
- Line Width, 0.4mm (nozzle size)
- Wall Count, 3
- Infill, 20%
- Print Temp, 200-210°C (PLA)
- Bed Temp, 60°C (PLA)
- Print Speed, 50mm/s
- Supports, Only when needed
- Retraction, Enabled, default values
- Adhesion, Skirt or Brim
Master these, get consistent prints, then explore advanced settings as specific problems arise.
Outgrowing Cura? If you want built-in calibration tools and a more modern interface, check out our OrcaSlicer guide, it’s quickly becoming the slicer of choice for power users.
Now go slice something and hit print.
Having issues with prints not sticking? Check out 3D Print Not Sticking: Every Fix You Need. Want to understand filament differences? Read PLA vs PETG vs ABS. Just getting started? See 3D Printing for Beginners or browse the 3D Printing Guide. Running Cura on a Mac? Check out best free macOS software for more creative tools.
Related Articles
The Real Dangers of 3D Printing: Fumes, Fires & Safety
Understand the hidden hazards of 3D printing. Learn about VOCs, ultrafine particles, fire risks, resin toxicity, and essential home workshop safety.
Printing with TPU & Flexible Filaments: Beginner Guide
Everything you need to know about 3D printing with TPU and flexible filaments in 2026. From printer settings to drying methods and preventing jams.
AI Tools for 3D Printing: Revolutionize Your Workflow
Discover the best AI tools for 3D printing in 2026, from AI-assisted CAD and intelligent slicing to automated print monitoring for faster, reliable prints.