3D Print Not Sticking to Bed? Every Fix You Need
First layer keeps failing? Here's every reason your 3D print won't stick to the bed and how to fix it—from bed leveling to adhesion helpers.
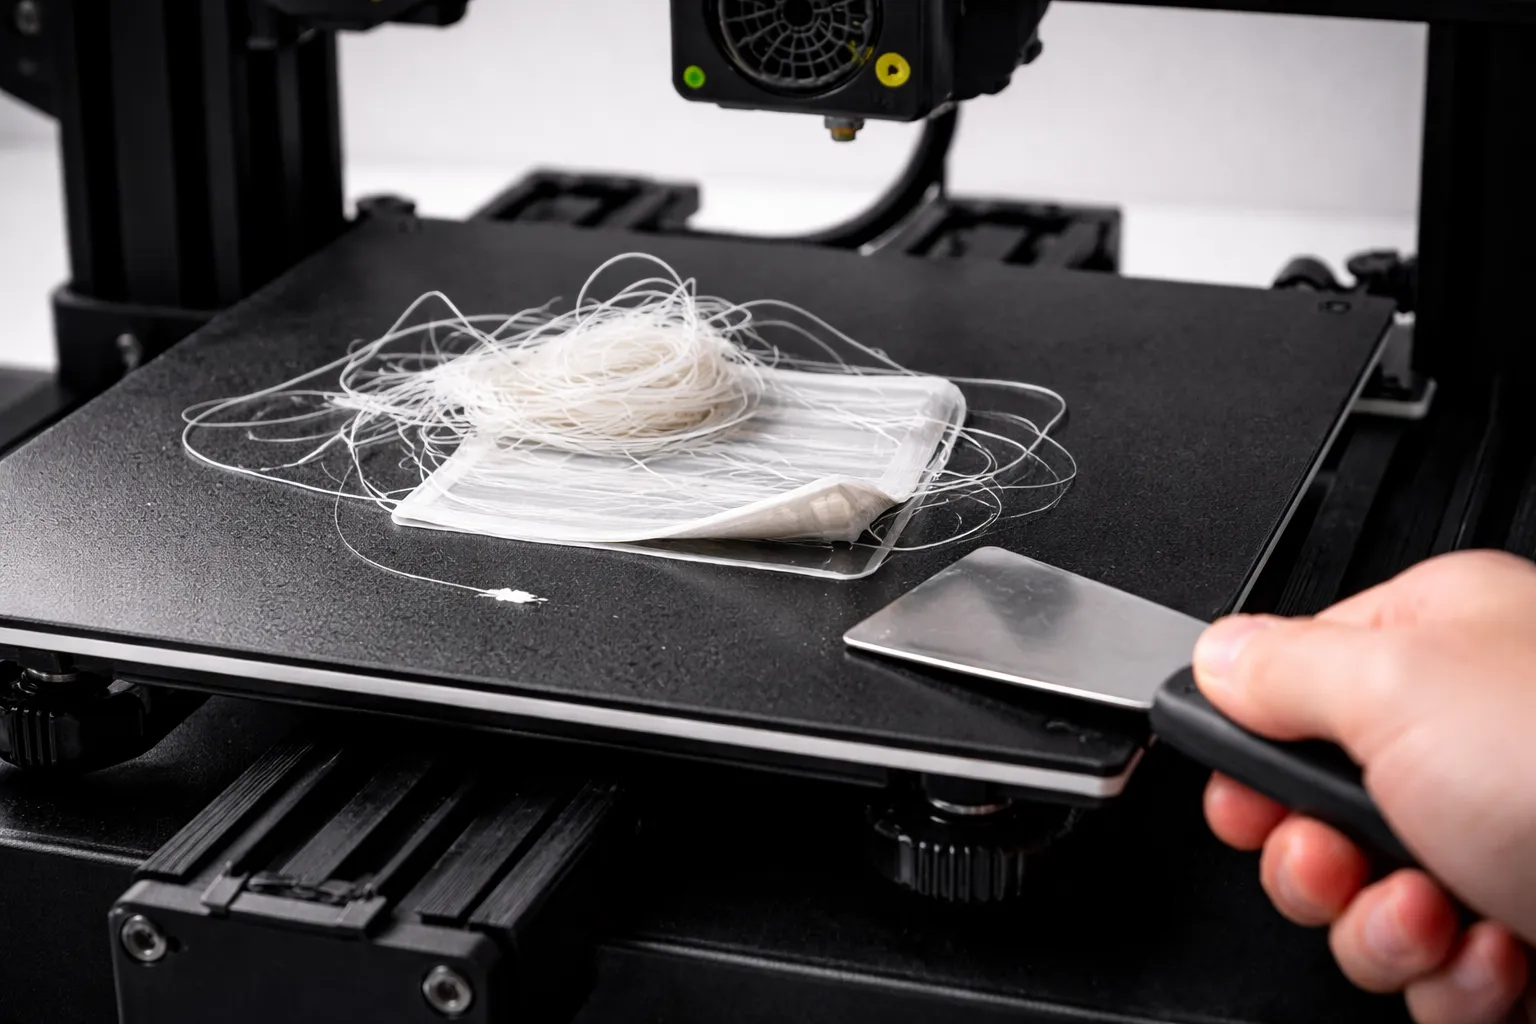
You hit print, walk away excited, and come back to find a bird’s nest of filament where your print should be. The first layer didn’t stick.
Don’t panic. This is the most common 3D printing problem, and it’s almost always fixable. (New to 3D printing? Start with our beginner’s guide first.)
In this guide, I’ll walk you through every cause of bed adhesion failure and how to fix each one—from the obvious (dirty bed) to the subtle (wrong z-offset by 0.05mm).
Why First Layer Adhesion Matters
The first layer is the foundation of your entire print. If it fails:
- Small parts detach and get dragged around
- Corners lift (warping)
- The whole print eventually fails
The good news: Once you nail first layer adhesion, most prints just work.
The Quick Fix Checklist
Try these in order before diving deeper:
- Clean your bed with isopropyl alcohol (90%+)
- Re-level your bed using the paper method
- Slow first layer to 20mm/s
- Increase bed temp by 5-10°C
- Decrease nozzle-to-bed distance slightly (0.05mm)
This fixes 80% of adhesion problems. If not, keep reading.
Cause #1: Dirty or Oily Build Surface
The problem: Oils from your fingers, dust, or residue from previous prints create a slippery surface.
Symptoms:
- Print starts fine, then suddenly detaches
- First layer looks good but won’t stick
- Random spots where filament doesn’t adhere
The fix:
- Remove the build plate if possible
- Clean with 90%+ isopropyl alcohol and a lint-free cloth
- For stubborn residue: warm soapy water, then IPA
- Avoid touching the print surface with bare hands
Pro tip: Clean your bed before every print, or at least every few prints. It takes 30 seconds and prevents hours of failed prints.
Deep Cleaning (Monthly)
For PEI sheets that have lost their grip:
- Wash with dish soap and warm water
- Lightly sand with 1000-2000 grit sandpaper (circular motions)
- Clean with IPA
- Your PEI will grip like new
Cause #2: Bed Not Level (Nozzle Too Far)
The problem: If the nozzle is too far from the bed, the filament doesn’t get “squished” enough to bond.
Symptoms:
- First layer lines are round, not flat
- Filament doesn’t stick, just sits on the surface
- Lines don’t connect to each other
- You can easily peel off the first layer
The fix: The Paper Method
- Home your printer (X, Y, Z)
- Disable steppers so you can move the head manually
- Move nozzle to front-left corner
- Slide paper between nozzle and bed
- Adjust the corner until you feel slight resistance when pulling the paper
- Repeat for front-right, back-right, back-left, and center
- Do the whole process twice (adjusting one corner affects others)
What “slight resistance” means:
- Paper slides with light friction = perfect
- Paper slides freely = nozzle too high (lower it)
- Paper won’t move / tears = nozzle too low (raise it)
Automatic Bed Leveling (ABL)
If your printer has a probe (BLTouch, CR Touch, inductive), use it:
- Run the bed leveling routine
- Save the mesh to EEPROM
- Ensure your slicer adds
G29afterG28in the start G-code
ABL compensates for warped beds but doesn’t replace proper tramming.
Cause #3: Nozzle Too Close to Bed
The problem: If the nozzle is too close, filament can’t extrude properly.
Symptoms:
- Very thin or no filament on first layer
- Nozzle scrapes the bed (bad sounds)
- Filament builds up around the nozzle
- First layer is transparent or has gaps
The fix:
- Raise the nozzle slightly (0.05mm at a time)
- Re-level with less paper resistance
- Adjust z-offset in firmware or slicer
Cause #4: Bed Temperature Too Low
The problem: The bed isn’t warm enough to keep the plastic soft at the contact point.
Symptoms:
- Corners lift after a few layers (warping)
- Print pops off suddenly during print
- Adhesion fine in center, fails at edges
Recommended bed temperatures:
| Material | Bed Temp | If Issues |
|---|---|---|
| PLA | 50-60°C | Try 65°C |
| PETG | 70-80°C | Try 85°C |
| ABS | 100-110°C | Ensure enclosure |
| TPU | 40-50°C | Or room temp |
The fix:
- Increase bed temp by 5-10°C
- Wait for bed to fully heat before printing (give it 2-3 extra minutes)
- Check if your bed temp is accurate (cheap thermometer test)
Cause #5: First Layer Too Fast
The problem: The first layer needs time to bond. Printing too fast doesn’t give it a chance.
Symptoms:
- First layer looks rushed or messy
- Corners don’t stick down
- Works sometimes, fails randomly
The fix:
- Set first layer speed to 20-25mm/s
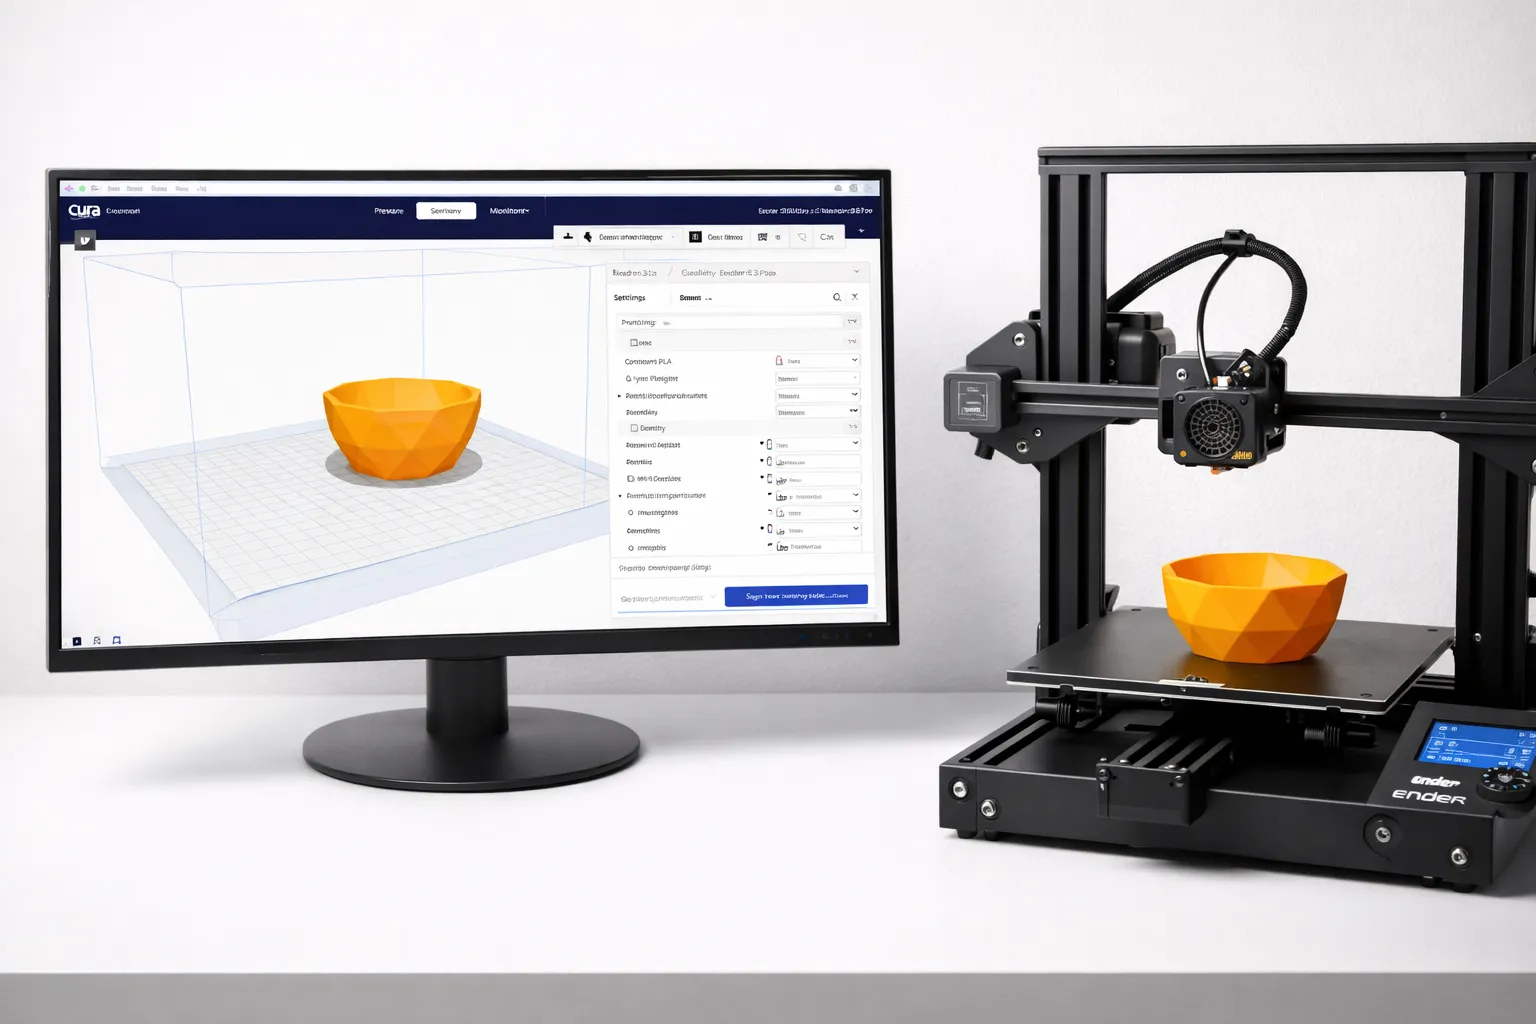
- In Cura: “Initial Layer Speed”
- In PrusaSlicer: “First layer speed”
Slower = more time to bond = better adhesion.
Cause #6: First Layer Too Thin or Thick
The problem: The first layer height affects how well it squishes into the bed.
Symptoms:
- Very thin first layer = not enough material
- Very thick first layer = not enough squish
The fix:
- Use 0.2-0.3mm first layer height (even if using 0.1mm for rest of print)
- In Cura: “Initial Layer Height”
- Higher first layer = more forgiving for imperfect leveling
Cause #7: Wrong Build Surface for Material
Different surfaces work better with different materials:
| Surface | Best For | Avoid |
|---|---|---|
| PEI (smooth) | PLA, ABS | PETG (sticks too well) |
| PEI (textured) | PETG, PLA | — |
| Glass | PLA (with glue), ABS (with hairspray) | PETG (without release agent) |
| BuildTak | PLA, ABS | PETG |
| Magnetic flex plates | Varies | Check manufacturer |
PETG on smooth PEI warning: PETG bonds so strongly to smooth PEI that it can rip chunks out of your bed. Use glue stick as a release agent, or switch to textured PEI.
Cause #8: Warped Bed
The problem: Many beds aren’t perfectly flat—they’re higher in the middle or have low corners.
Symptoms:
- Perfect adhesion in some spots, none in others
- Works great in center, fails at corners
- Inconsistent results across the bed
The fixes:
- Manual mesh leveling: Level at 9-25 points instead of just 4 corners
- ABL probe: Install a BLTouch/CR Touch if you don’t have one
- Glass bed: Add a piece of borosilicate glass (much flatter than aluminum)
- Print in the center: Avoid edges of the bed
Cause #9: Drafts and Temperature Fluctuations
The problem: Cold air hits the print, causing rapid cooling and warping.
Symptoms:
- One side of print lifts more than others
- Issues worse in winter or with AC
- Works fine with small prints, fails with large ones
The fix:
- Move printer away from windows, doors, AC vents
- Build an enclosure (even cardboard helps)
- Close the room door during printing
Adhesion Helpers (When All Else Fails)
Sometimes you need extra help. Here are your options:
Glue Stick
How: Apply thin, even layer to bed before printing. Reapply every few prints.
Pros:
- Cheap and available everywhere
- Works great for PLA on glass
- Acts as release agent for PETG on PEI
Cons:
- Needs reapplication
- Makes bed cleanup necessary
Recommended: Elmer’s Purple Glue Stick (dries clear)
Hairspray
How: Light spray on bed, let dry before printing.
Pros:
- Thin, even coating
- Works well for ABS
Cons:
- Overspray gets everywhere
- Strong smell
- Can gum up over time
Recommended: Aqua Net (unscented if possible)
Painter’s Tape (Blue Tape)
How: Apply strips to bed, overlapping slightly.
Pros:
- Cheap and easy
- Great for PLA
- No bed heating needed
Cons:
- Needs replacement often
- Can leave residue
- Texture shows on bottom of print
Commercial Adhesives
- Magigoo: Made for 3D printing, works great, expensive
- 3DLac: Spray adhesive, popular in Europe
- Vision Miner Nano Polymer: Professional grade
Brims and Rafts
When surface adhesion isn’t enough, add more surface area:
Brim
What: Extra lines around the base of your print, attached to it.
When to use:
- Tall, thin prints
- Small contact area
- Slight adhesion issues
Settings:
- Brim width: 8-15mm
- Brim lines: 5-15
Pros: Uses minimal material, easy to remove Cons: Leaves slight edge to clean up
Raft
What: Full platform printed under your model.
When to use:
- Severely warped beds
- Very small contact areas
- When nothing else works
Settings:
- Raft air gap: 0.2-0.3mm (for easier removal)
Pros: Maximum adhesion, compensates for bad beds Cons: Wastes material, rough bottom surface, hard to remove
Recommendation: Always try a brim first. Rafts are a last resort.
First Layer Settings Cheat Sheet
Copy these settings for reliable first layers:
First Layer Height: 0.2-0.3mm (even for 0.12mm layer height prints)
First Layer Speed: 20-25mm/s
First Layer Flow: 100-105%
First Layer Width: 120% of nozzle diameter

Bed Temperature:
- PLA: 60°C
- PETG: 80°C
- ABS: 100°C

Initial Fan Speed: 0% (let first layers bond without cooling)
Troubleshooting Decision Tree
Print doesn’t stick at all:
- Clean bed with IPA
- Re-level bed (paper method)
- Decrease nozzle distance (z-offset -0.05mm)
- Increase bed temp +10°C
Print starts sticking, then lifts:
- Slow first layer speed
- Add brim
- Check for drafts
- Increase bed temp
Print sticks in center but not corners:
- Bed is warped—use mesh leveling
- Print in center of bed
- Consider glass bed upgrade
Print sticks too well (can’t remove):
- Let bed cool completely
- Use less adhesive
- Flex the build plate
- For PETG on PEI: use glue stick as release agent
Conclusion
First layer adhesion comes down to three things:
- Clean surface — IPA wipe before printing
- Proper distance — Nozzle close enough to squish filament
- Right temperature — Bed warm enough to keep plastic soft
Master these three, and 90% of your adhesion problems disappear.
When those aren’t enough, add a brim, use glue stick, and slow things down. Save rafts for emergencies only.
Now go rescue that failed print.
Want to understand your slicer better? Check out Cura Settings for Beginners. Having issues with specific materials? Read PLA vs PETG vs ABS. For all our 3D printing content, see the 3D Printing Guide.
Related Articles
Cura Settings for Beginners: The Only Guide You Need
Confused by Cura's 400+ settings? Learn the 10 settings that actually matter, what they do, and the best values for your first prints.

Designing Your Own Gear: Best CAD Software for 3D Printing (2026 Guide)
Want to design your own 3D prints? We compare Tinkercad, Fusion 360, Onshape, and Blender to help you find the best CAD software for your needs and skill level.
3D Printing for Beginners (2026): From Zero to First Print
Start 3D printing today. Printer recommendations under $300, material guide, and step-by-step to your first successful print.