OpenSCAD for Beginners: Design 3D Prints with Code (2026 Guide)
Learn how to use OpenSCAD to design custom 3D prints by writing code. This beginner-friendly guide covers the basics, key commands, and your first real project.
Most people get into 3D printing by downloading other people’s models. That’s fine for the first few weeks. But eventually, you want to print your thing — a custom wall bracket, a replacement clip, a gift with someone’s initials on it.
That’s when you hit the wall. Tinkercad feels like building with LEGO bricks (fun, but limited). Fusion 360 feels like learning to fly a plane when you just wanted to ride a bike.
Then there’s OpenSCAD.
OpenSCAD is the outlier. It doesn’t have a fancy viewport you can drag and click. There are no toolbars. You don’t draw shapes — you code them. And for a specific type of person (the kind bored enough to read about CAD software at their desk), it is the most satisfying tool in the maker’s toolkit.
What Is OpenSCAD?
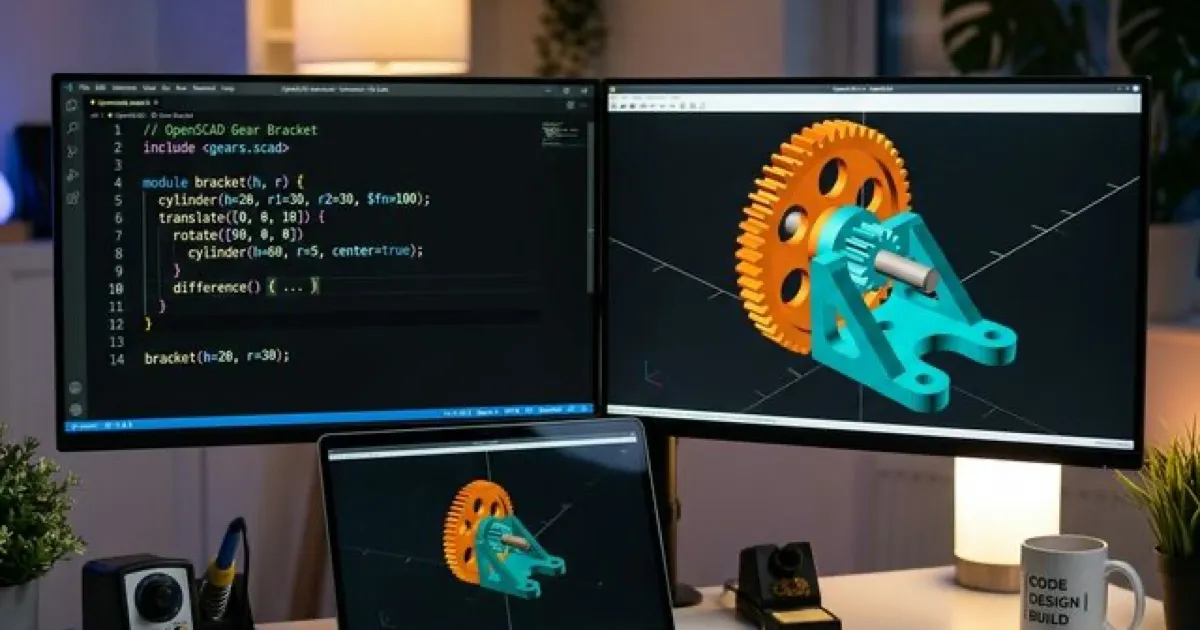
OpenSCAD is a free, open-source 3D CAD modeler where models are created entirely through a scripting language. Think of it as programming, but the output isn’t an app or a website — it’s a physical object you can hold in your hand.
The software was created in 2010 by Marius Kintel and is still actively maintained. It’s used by engineers, makers, teachers, and hobbyists worldwide. It runs on Windows, macOS, and Linux. It’s completely free. And it exports directly to STL, ready for your slicer.
| Feature | Detail |
|---|---|
| Price | Free (Open Source) |
| Platform | Windows, macOS, Linux, Browser |
| Export | STL, AMF, 3MF, OFF |
| Skill Level | Beginner-friendly if you’ve ever typed a formula in Excel |
| Best For | Precise, parametric, repeatable mechanical parts |
Why Code Your Models Instead of Drawing Them?
This is a fair question. Every other CAD tool lets you click and drag geometry around a screen — why would you type a model into existence?
The answer is parametric design at its simplest.
In Fusion 360, making a model parametric requires setting up a dedicated “Parameters” panel. In OpenSCAD, it’s the natural way to work. Every single value in your model is a number you typed. Want to make the model twice as tall? Change one number. Want to make 10 variations of the same bracket with different hole sizes? Write a loop.
The spreadsheet analogy: If Fusion 360 is Excel with a mouse-driven graphing UI, OpenSCAD is a spreadsheet formula. Less visual, but far more powerful for batch changes and repeatable logic.
It also means your design is version-controllable. Your OpenSCAD file is a .scad text file. You can track changes in Git, email it to a friend, and diff two versions in seconds. Try doing that with a Fusion 360 file.
The Core Concepts (in Plain English)
1. Primitives: Your Building Blocks
Everything in OpenSCAD starts with three primitive shapes:
cube([30, 20, 10]);   // width, depth, height
sphere(r = 15);        // radius
cylinder(h = 40, r = 10);  // height, radius
That’s it. Three shapes. Everything you will ever design is a combination of these three, scaled, moved, and combined.
2. Transformations: Moving Shapes Around
Once you have a shape, you move it with translate, rotate it with rotate, and mirror it with mirror:
translate([10, 0, 0])   // move 10mm along the X axis
  cube([20, 20, 20]);

rotate([0, 45, 0])      // tilt 45 degrees around the Y axis
  cube([20, 5, 5]);
The key rule: the transformation always applies to the shape on the next line (or inside the following { } block).
3. Boolean Operations: The Magic Trick
Here’s where OpenSCAD gets powerful. You can combine shapes using three Boolean operations:
union()— merge two shapes into one soliddifference()— subtract one shape from another (this is how you make holes)intersection()— keep only the overlapping part of two shapes
difference() {
  cube([30, 30, 30]);       // start with a solid cube
  cylinder(h = 35, r = 8); // punch a cylinder-shaped hole through it
}
Run that, and you’ve got a cube with a perfectly centered circular hole through it. In Tinkercad, you’d fuss with alignment guides. Here, you typed five lines.
4. Variables: The Superpower
This is the moment OpenSCAD clicks for most people:
wall_thickness = 3;
box_width      = 50;
box_height     = 30;

difference() {
  cube([box_width, box_width, box_height]);
  translate([wall_thickness, wall_thickness, wall_thickness])
    cube([box_width - wall_thickness*2, box_width - wall_thickness*2, box_height]);
}
Change wall_thickness = 3 to wall_thickness = 5 and your entire box updates. Every derived dimension adjusts automatically. This is parametric design — and it took zero menu navigation to achieve.
Your First Real Project: A Simple Phone Stand
Let’s build something you can actually print. A minimal phone stand — a wedge with a slot cut into it.
// --- PARAMETERS ---
stand_width = 80; // mm wide
stand_depth = 60; // mm deep
stand_height = 50; // mm tall at the back
slot_width = 10; // slot for phone to rest in
slot_depth = 20; // how deep the slot goes
// --- MODEL ---
difference() {
// Base wedge shape
hull() {
cube([stand_width, stand_depth, 2]); // thin front edge
translate([0, 0, stand_height - 2])
cube([stand_width, 5, 2]); // tall back edge
}
// Slot for the phone
translate([(stand_width - slot_width) / 2, 0, -1])
cube([slot_width, slot_depth, stand_height + 2]);
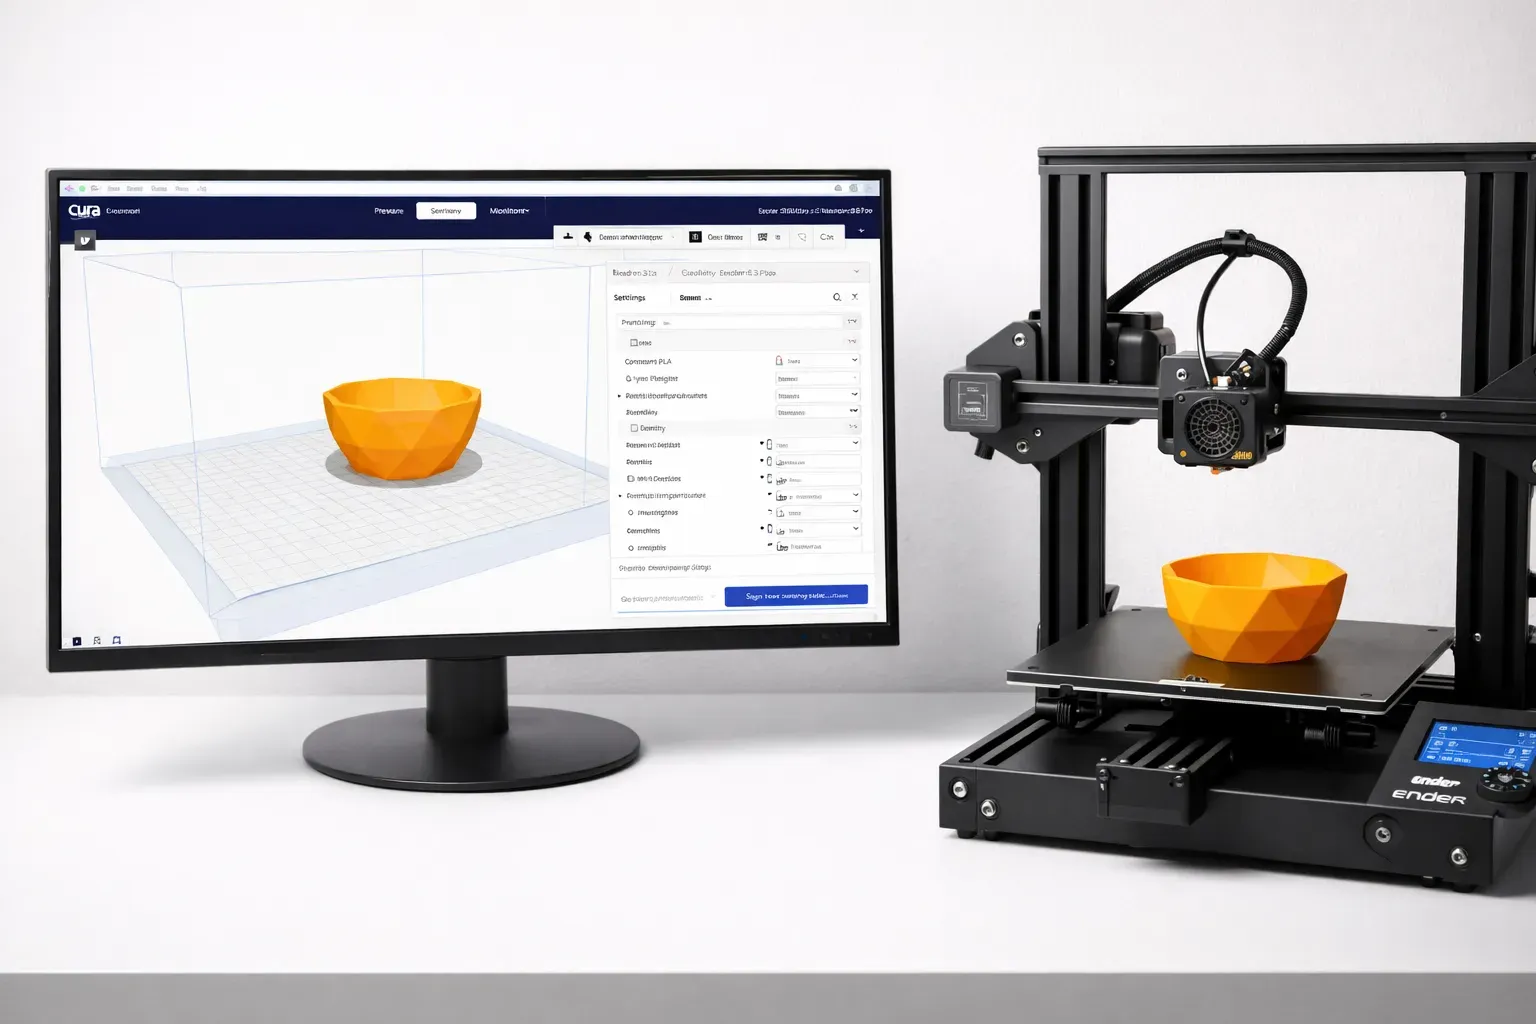
}Click F6 to render the final model, then File → Export → Export as STL. Drop it into your slicer and you’ve got a print-ready phone stand you designed from scratch.
Try changing stand_width = 80 to stand_width = 120 for a tablet stand. The slot and proportions all update automatically.
Key Commands Cheat Sheet
| Command | What it Does |
|---|---|
cube([x, y, z]) | Creates a box |
sphere(r = n) | Creates a sphere |
cylinder(h = n, r = n) | Creates a cylinder or cone |
translate([x, y, z]) | Moves a shape |
rotate([x, y, z]) | Rotates a shape (in degrees) |
scale([x, y, z]) | Scales a shape |
mirror([x, y, z]) | Mirrors a shape along an axis |
union() | Merges shapes |
difference() | Subtracts shapes |
intersection() | Keeps overlapping area only |
hull() | Wraps shapes in a convex hull |
linear_extrude(h) | Extrudes a 2D shape into 3D |
module name() { } | Defines a reusable shape block |
for (i = [0:5]) { } | Loops to repeat shapes |
| F5 | Quick preview (fast) |
| F6 | Full render (slower but accurate) |
OpenSCAD vs. The Alternatives
| Tool | Interaction Style | Best For | Parametric? |
|---|---|---|---|
| OpenSCAD | Code | Precise, repeatable parts | ✅ Native |
| Tinkercad | Drag & Drop | Kids, first-timers | ❌ Limited |
| Fusion 360 | GUI + Sketches | Professional workflows | ✅ Manual setup |
| FreeCAD | GUI + Sketches | Open-source alt to Fusion | ✅ Manual setup |
| Blender | Mesh sculpting | Organic shapes, art | ❌ Not its purpose |
OpenSCAD isn’t better than Fusion 360 — it’s different. Fusion 360 excels at complex surface modeling and large assemblies. OpenSCAD excels at algorithmic, repeatable, math-driven geometry. Designing a customizable parametric box generator? OpenSCAD wins. Designing an ergonomic mouse housing with curved surfaces? Use Fusion 360.
Tips for Working at Your Desk
The beauty of OpenSCAD is that it looks like you’re doing serious programming work. The .scad file is just a text file. You can work on it in any text editor — including VS Code, which has a solid OpenSCAD extension with syntax highlighting and preview integration.
Three things to do during your next slow meeting:
- Install OpenSCAD from openscad.org — it’s under 20 MB
- Open the built-in examples (File → Examples) — they cover almost every concept
- Find a thing to replace: Look around your desk. A broken pen holder, a loose cable clip, a missing rubber foot on your monitor — model it
Going Further: The OpenSCAD Rabbit Hole
Once you’re comfortable with the basics, here’s what to explore next:
linear_extrudewithtwist: Takes a 2D polygon and twists it as it rises — the secret to printing spiral vases and auger screws- The
BOSL2library: A community-built library of pre-coded shapes — threads, gears, dovetails, lattices. Import it and you can add a perfectly threaded bolt hole in one line - Customizer: OpenSCAD has a built-in “Customizer” panel. Add special comment annotations to your variables and OpenSCAD generates a sliders-and-dropdowns UI. It’s how Thingiverse “Customizable” models are built
- Recursive modules: You can call a module from within itself. This is how OpenSCAD creates fractals, branching structures, and interlocking chain links
FAQ
1. Do I need programming experience to use OpenSCAD?
No. OpenSCAD’s language is far simpler than any general-purpose programming language. There are no data types to memorize, no imports to manage, no frameworks. If you’ve ever written an IF statement in Excel, you already understand 80% of the logic involved.
2. How do I add threads in OpenSCAD?
Use the BOSL2 library. After installing it, a single line like screw_hole("M3", length=10) generates a perfectly dimensioned threaded hole. Without a library, threading by hand involves math that would take an afternoon to figure out.
3. Can I import existing STL files into OpenSCAD?
Yes, with import("myfile.stl"). You can then use it in Boolean operations — useful for adding features to a downloaded base model. The imported geometry isn’t editable, but you can cut into it or add onto it.
Conclusion: The Programmer’s CAD Tool
OpenSCAD is niche by design. It will never have the slick UI of Fusion 360 or the brand recognition of Tinkercad. But for people who think in systems, love the feeling of a model updating when they change a single number, and want their designs to live in a text file they can commit to Git — there is nothing better.
It’s also the kind of skill that sounds impressive when you explain it: “I write code that generates 3D geometry.”
Start with a simple box. Add a hole. Give your dimensions a variable. By the time anyone realizes you’ve been “working” in OpenSCAD all afternoon, you’ll have a finished print sitting on your desk.
Curious about the broader 3D printing world? Check out our 3D Printing Guide for the full overview, or read our CAD Software Comparison to see how OpenSCAD stacks up against Fusion 360, Tinkercad, and more.
Related Articles
Designing Your Own Gear: Best CAD Software for 3D Printing (2026 Guide)
Want to design your own 3D prints? We compare Tinkercad, Fusion 360, Onshape, and Blender to help you find the best CAD software for your needs and skill level.
3D Print Not Sticking to Bed? Every Fix You Need
First layer keeps failing? Here's every reason your 3D print won't stick to the bed and how to fix it—from bed leveling to adhesion helpers.
Cura Settings for Beginners: The Only Guide You Need
Confused by Cura's 400+ settings? Learn the 10 settings that actually matter, what they do, and the best values for your first prints.