RFID Record Player: The Coolest Way to Play Spotify with Physical 'Digital Vinyl'
Discover the RFID Record Player, a DIY project that combines the tactile feel of vinyl with the convenience of Spotify. Learn how to build your own with a Raspberry Pi and 3D printing.
If you love the tactile experience of flipping through a record crate but hate the crackle of a scratched LP (or the price of modern vinyl), Fatih Ak has created the perfect project for you.
The RFID Record Player is a DIY masterpiece that uses Raspberry Pi and RFID technology to turn simple drink coasters into “digital vinyl.” It’s one of those projects that makes you wonder why no one thought of it sooner.
The Concept: Physical Meets Digital
In an age where music is an invisible stream of data, we’ve lost the ritual of choosing an album, placing it on a platter, and moving the needle. This project brings that ritual back.
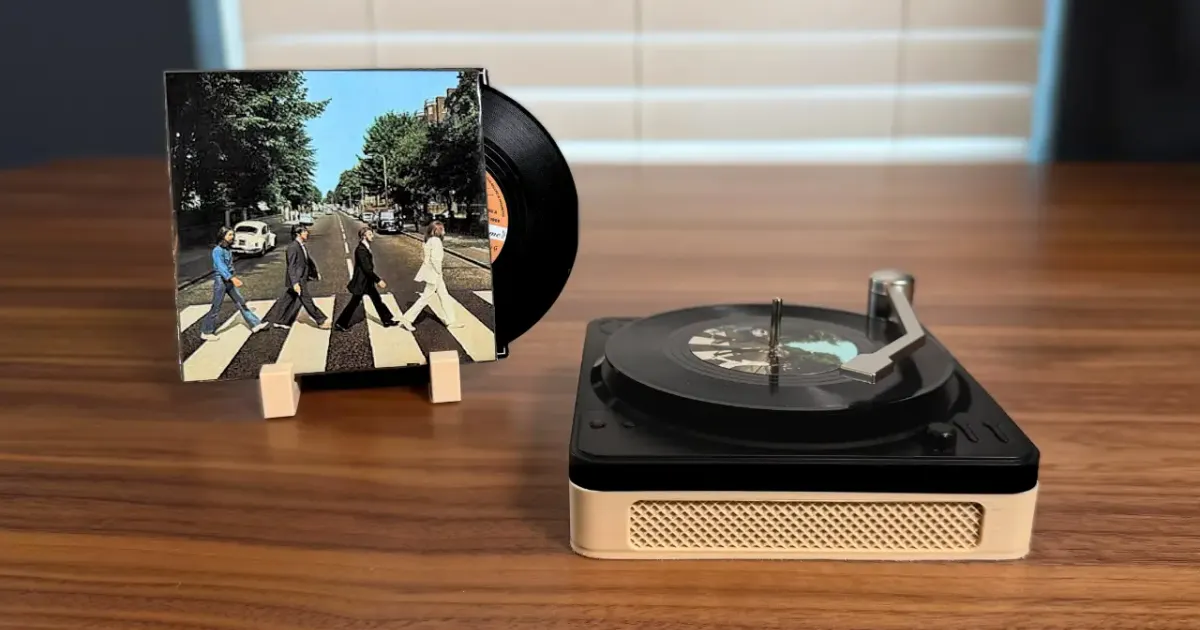
Each “record” is actually a vinyl-themed coaster with a tiny NTAG213 NFC tag hidden inside. When you place the coaster on the player, an RFID reader identifies the tag and tells Spotify exactly what to play. Pick up the tone arm, drop it on the record, and your room fills with music — just like the real thing, minus the dust and static.
How It Works
This isn’t just a simple RFID trigger; the project goes the extra mile to simulate a real turntable:
- The Trigger: An RC522 RFID module reads the tag on the coaster.
- The Interaction: A Hall Effect sensor detects a magnet in the tone arm. The music only starts when you physically move the arm onto the “record.”
- The Visuals: A 28BYJ-48 stepper motor spins the platter while the music is playing, giving you that classic spinning-disc aesthetic.
- The Brains: A Raspberry Pi Zero 2W handles the logic, connects to the Spotify API, and manages the hardware components.
The entire system runs on Python and communicates with Spotify’s Web API via OAuth. When the RFID reader detects a new tag, it looks up the mapped Spotify URI and starts playback on your active device. Lift the tone arm off, and the music pauses — just like a real turntable.
Building Your Own
To build this, you’ll need a mix of electronics and 3D printing. If you’re new to the hobby, our 3D Printing Beginner’s Guide covers everything from choosing your first printer to dialing in your first print. For the enclosure itself, an FDM printer with PLA filament works perfectly.
Hardware Checklist
| Component | Purpose | Approx. Cost |
|---|---|---|
| Raspberry Pi Zero 2W | Main controller | $15-20 |
| RC522 RFID Reader | Scans NFC tags on coasters | $3-5 |
| 28BYJ-48 Stepper Motor + ULN2003 Driver | Spins the platter | $3-5 |
| A3144E Hall Effect Sensor | Detects tone arm position | $1-2 |
| NTAG213 NFC Stickers (pack of 50) | One per “record” | $10-15 |
| Vinyl Record Coasters | The actual “records” | $10-15 |
| Jumper Wires + Micro USB Cable | Wiring + power | $5-10 |
| Total | ~$50-70 |
You’ll also need to 3D print the enclosure, platter, and tone arm. The STL files are included in the GitHub repo. If you don’t own a printer yet, check out our best 3D printers under $300 — any of them will handle this project easily.
3D Printing the Parts
The enclosure, platter, and tone arm are designed to print without supports on most FDM printers. A few tips:
- Material: PLA is the best choice. It’s easy to print, looks clean, and the parts don’t need heat resistance.
- Layer Height: 0.2mm for the enclosure, 0.16mm for the tone arm if you want finer detail.
- Infill: 15-20% is enough. These parts don’t bear heavy loads.
- Print Time: The full set takes roughly 6-8 hours depending on your printer speed.
If you’re still getting familiar with slicer settings, our Cura Settings for Beginners guide walks through every parameter that matters.
Software Setup
The project comes with a handy install.sh script that sets up the Python environment. You’ll need to create a Spotify Developer account to get your Client ID and Client Secret, which allows the Pi to control your playback.
Once you’ve cloned the repo and run the installer, the setup process looks like this:
- Connect the RC522, stepper motor, and Hall Effect sensor to the Pi’s GPIO pins (wiring diagram is in the repo).
- Run the setup script to authenticate with Spotify.
- Map each NFC tag to a Spotify URI (album, playlist, or individual track).
- Place a coaster, drop the needle, and enjoy.
Making Your Record Collection
This is where the project gets really fun. Each coaster becomes an album in your collection:
- Print custom labels with album art and stick them on the coasters.
- Map tags to playlists that update automatically — your “Daily Mix” coaster plays something different every day.
- Create themed coasters for moods (Focus, Party, Chill) instead of specific albums.
- Make gift sets — a custom coaster mapped to someone’s favorite album is an incredibly thoughtful present.
A pack of 50 NTAG213 stickers costs about $10-15 on Amazon, so building a collection of 20+ “records” is surprisingly affordable.
Why This Is a Perfect Weekend Project
The RFID Record Player hits a sweet spot that’s rare in DIY projects:
- It’s achievable. You can build it in a weekend with basic soldering skills and a 3D printer. No CNC work, no custom PCBs.
- It’s useful. Unlike many maker projects that sit on a shelf after the build, this one gets daily use.
- It’s impressive. The spinning platter and functional tone arm make it a genuine conversation piece — people who see it always want to try it.
- It’s expandable. Add more coasters anytime. Remap tags when you discover new music. Swap the enclosure design for something that matches your room.
If you’ve been looking for a project that combines 3D printing with electronics and actually solves a real “problem” (making digital music feel tangible again), this is it.
Similar Projects Worth Exploring
Love the idea of functional 3D printed builds? Here are some related projects:
- Sesame Robot Quadruped — a fully 3D printed walking robot you can build at home.
- OpenSCAD Beginners Guide — learn to design your own parametric parts (like a custom enclosure for this player).
- Best Sites for Free 3D Models — find more printable project files on Printables, Thingiverse, and others.
Frequently Asked Questions
Do I need a Spotify Premium account for this project?
Yes, the Spotify Web API typically requires a Premium account for playback control on devices like a Raspberry Pi. The free tier doesn’t support remote playback commands through the API.
Can I use any RFID tags?
The project is designed for NTAG213 NFC tags, which are affordable and small enough to fit inside record coasters. A pack of 50 NTAG213 stickers costs around $10-15 on Amazon.
How much does the entire RFID Record Player build cost?
The total cost is roughly $50-70. A Raspberry Pi Zero 2W runs about $15-20, the RC522 RFID module is under $5, the stepper motor about $3-5, vinyl coasters around $10-15, and NFC tags about $10 for a pack. The 3D printed enclosure uses minimal filament.
Is the spinning platter necessary for the music to play?
Technically no, but it’s a key part of the “analog” experience. The code uses a stepper motor to spin the platter whenever music is playing. You could disable it in the code if you wanted a simpler build.
Can I use this with Apple Music or YouTube Music instead of Spotify?
The project is built around the Spotify Web API. Supporting other services would require rewriting the playback integration. However, since the code is open source, community forks for other platforms may appear over time.
Ready to start? Download the files and check out the wiring guide on the RFID Record Player GitHub.
Related Articles
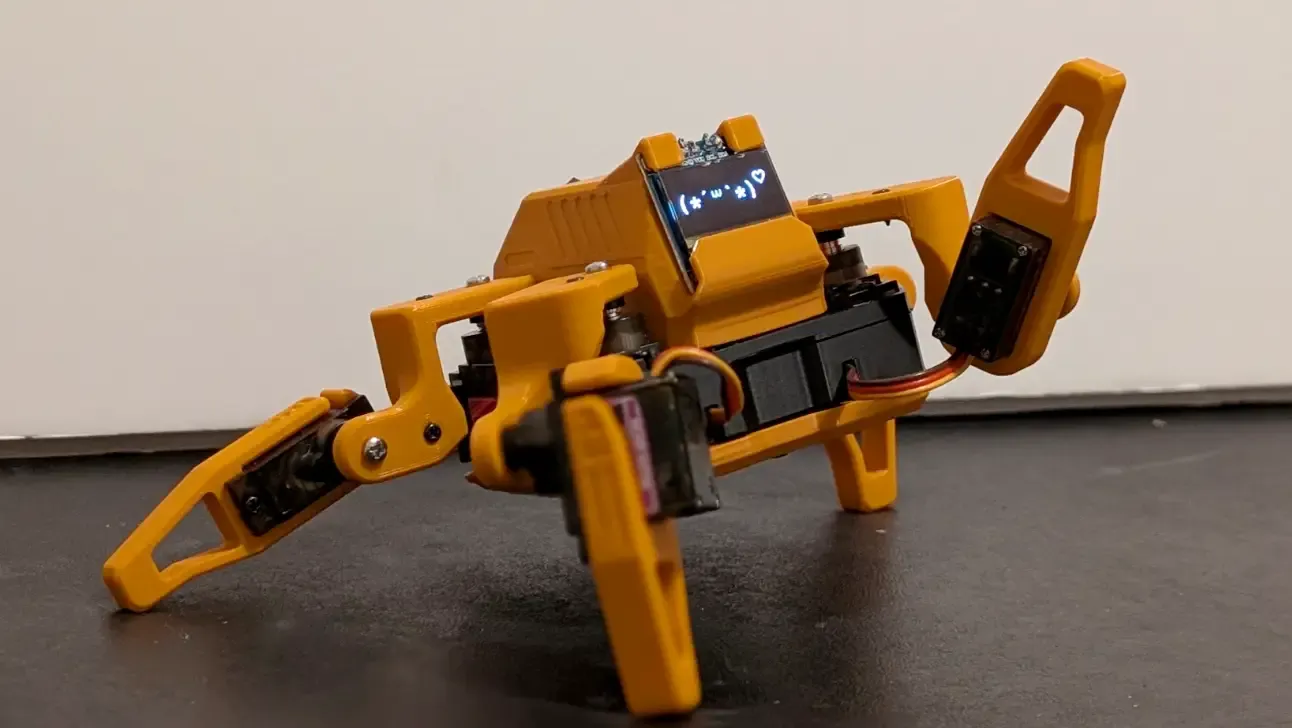
Sesame Robot: The Most Adorable DIY Quadruped You Can 3D Print
Build the Sesame Robot — an open-source 3D-printed quadruped with personality, OLED eyes, and WiFi control. Full BOM, print settings, and build guide inside.
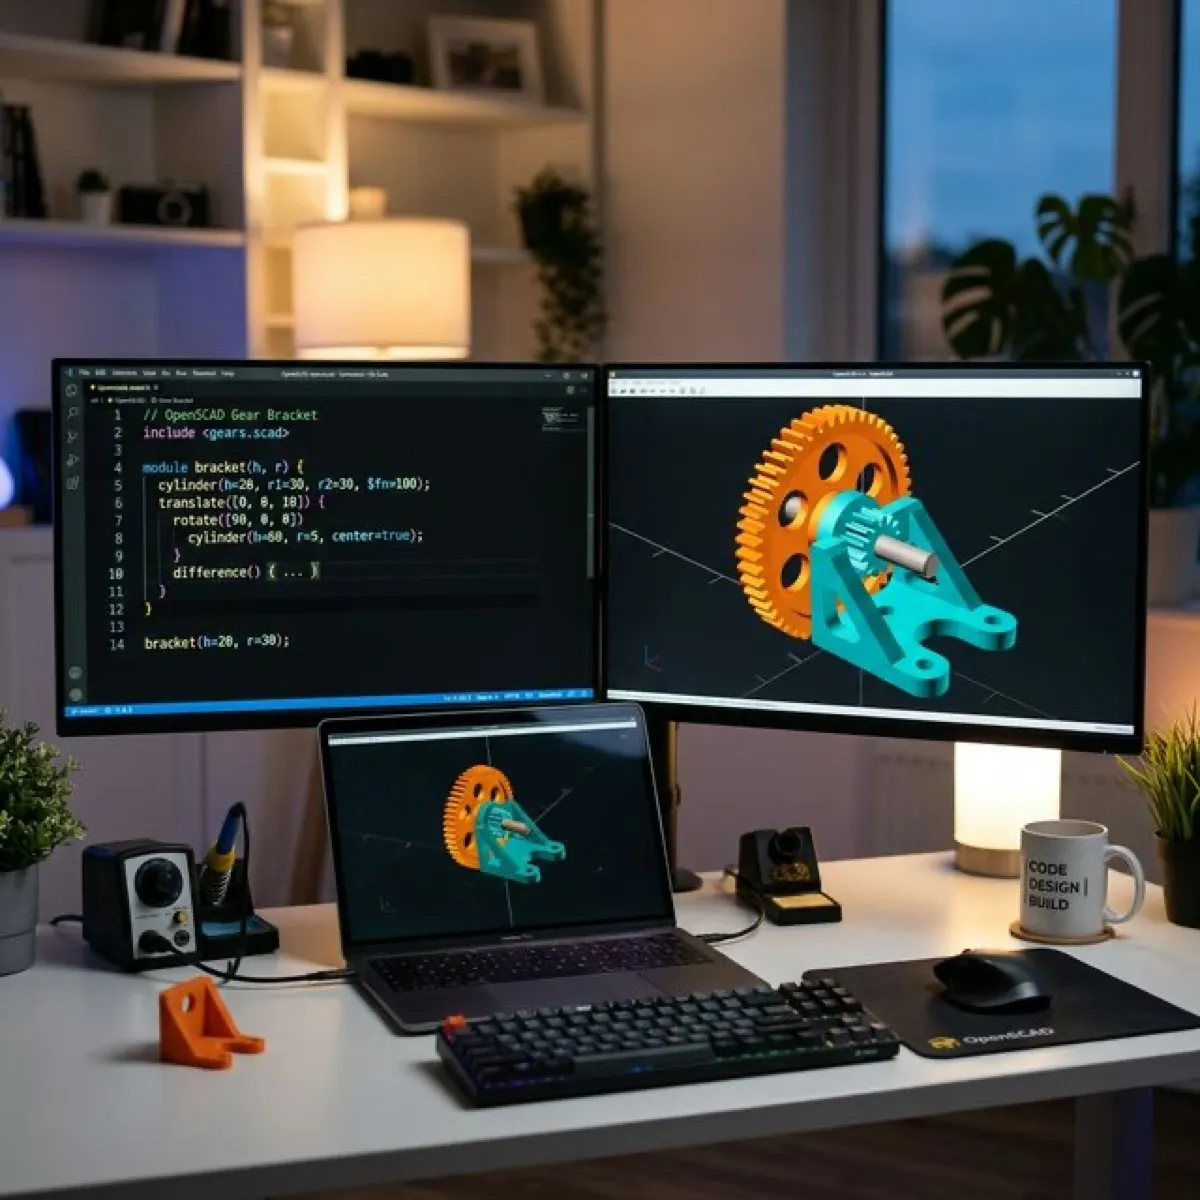
OpenSCAD for Beginners: Design 3D Prints with Code (2026 Guide)
Learn how to use OpenSCAD to design custom 3D prints by writing code. This beginner-friendly guide covers the basics, key commands, and your first real project.
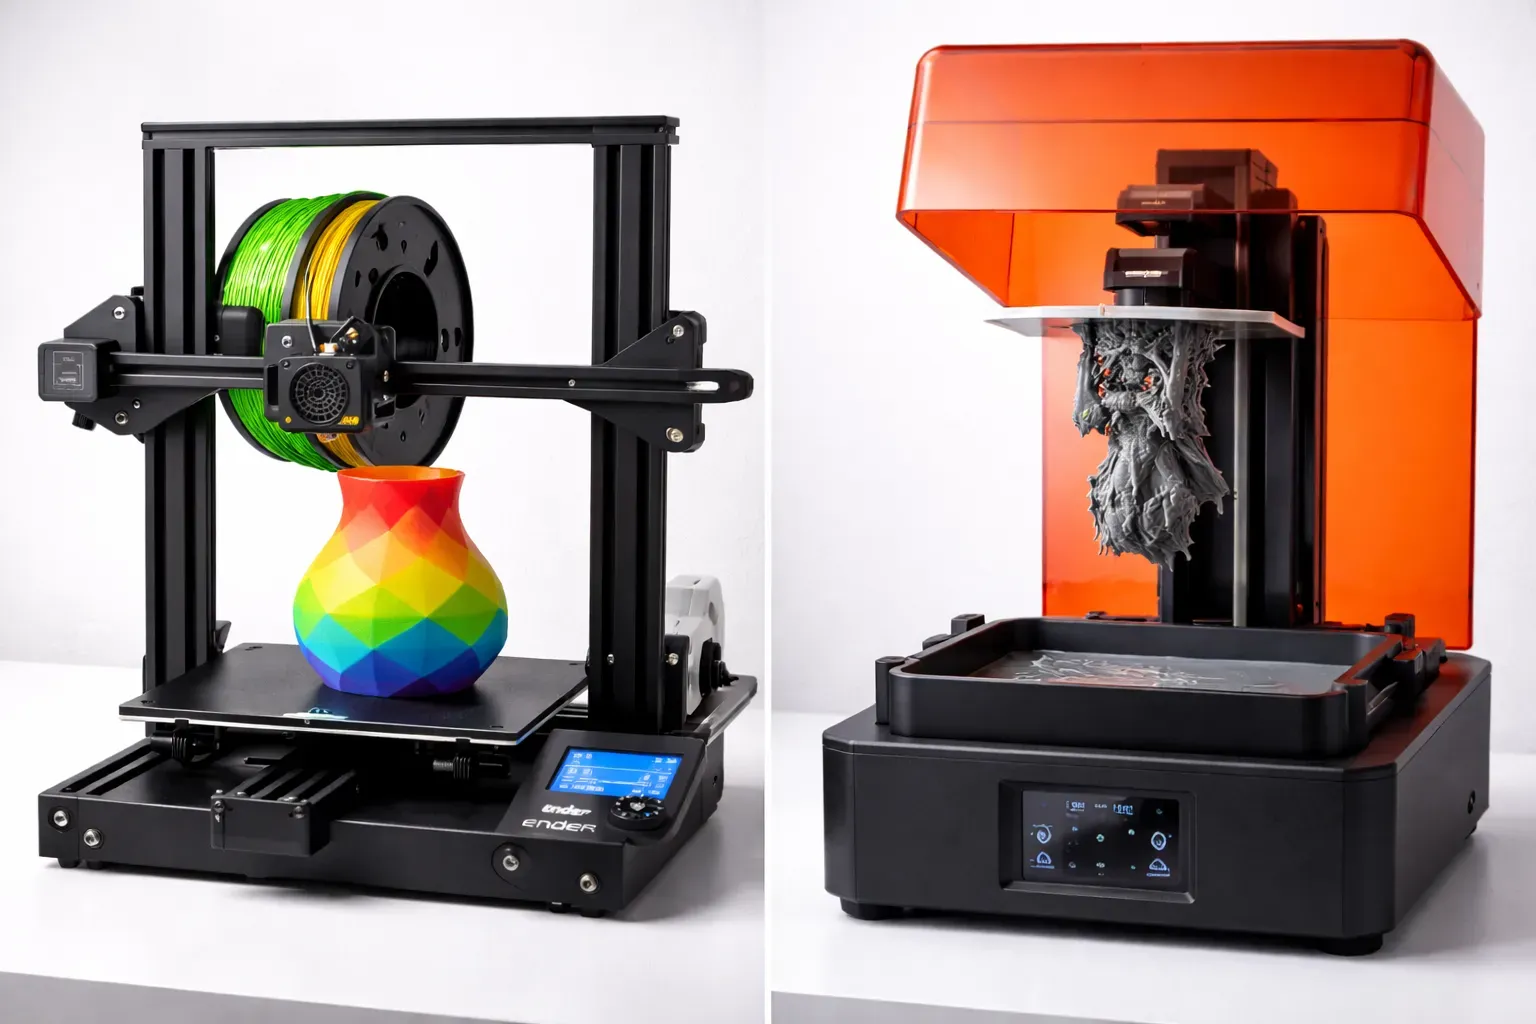
FDM vs Resin 3D Printing: Which One Should You Choose?
FDM vs resin 3D printing — we compare cost, print quality, safety, and ease of use with real examples to help you pick the right technology for your project.