Dual Monitor Setup Guide: How to Do It Right (2026)
Step-by-step guide to setting up dual monitors for your home office. Cables, settings, ergonomic positioning, and the mistakes most people make.
You have one monitor. You’ve seen people with two. You want two. But you’re not sure how to actually set it up without buying the wrong cables, getting a headache in Display Settings, or ending up with two screens at wildly different heights.
Good news: a dual monitor setup is one of the easiest and highest-impact upgrades in the desk upgrade guide. It takes about 30 minutes, costs nothing if you already have a second monitor, and the productivity bump is immediate, no more alt-tabbing between 47 browser tabs.
Here’s everything you need to set it up correctly the first time.
Why Dual Monitors?
This isn’t a “do you need dual monitors?” article. You do. Here’s why:
- Less alt-tabbing: Keep your main task on one screen and references (email, Slack, docs) on the other.
- Better for meetings: Video call on one screen, notes or shared documents on the other.
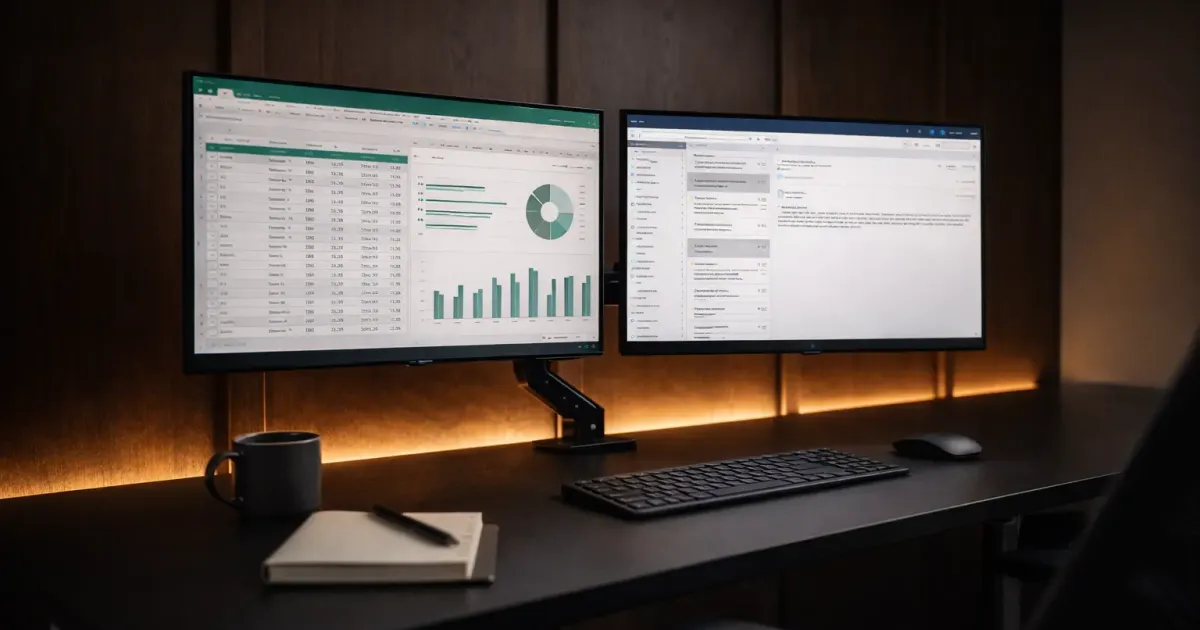
- Spreadsheet heaven: Full spreadsheet on the primary monitor, source data or dashboards on the secondary.
- Easier multitasking: Drag-and-drop between screens, compare documents side by side, monitor dashboards while working.
Research from the University of Utah found that dual monitors can increase productivity by 20-30% for common office tasks. You’ll feel it the first day.
Step 1: Check Your Ports and Cables
Before buying anything, look at what you already have.
Laptop Ports
| Port | Looks Like | Supports Video? | Notes |
|---|---|---|---|
| HDMI | Wide trapezoid | Yes | Most common, easy |
| USB-C / Thunderbolt | Small oval | Usually | Check specs, not all USB-C ports carry video |
| Mini DisplayPort | Small rectangle | Yes | Common on older MacBooks and Surface devices |
| DisplayPort | Rectangle with one cut corner | Yes | Rare on laptops, common on desktops |
Most laptops (2022+) have 1-2 USB-C/Thunderbolt ports and 1 HDMI port. That’s enough for two monitors.
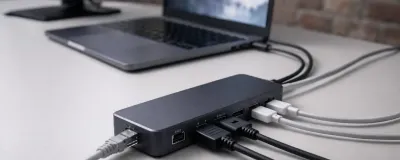
If you only have USB-C ports: A USB-C docking station turns one port into HDMI + DisplayPort + USB + Ethernet. It’s the cleanest solution for laptop users.
Desktop Ports
Look at the back of your GPU (the graphics card), not the motherboard. If you have a dedicated GPU, use its ports exclusively, using motherboard ports alongside GPU ports can cause issues.
Most desktop GPUs have:
- 1-3x DisplayPort
- 1x HDMI
- Sometimes 1x USB-C
Two DisplayPort cables give you the best quality and highest resolution/refresh rate support. HDMI works fine for office work.
What Cables Do You Need?
| Scenario | Cable 1 | Cable 2 |
|---|---|---|
| Desktop with GPU | DisplayPort | DisplayPort |
| Laptop with HDMI + USB-C | HDMI | USB-C to HDMI (or dock) |
| Laptop with 2 USB-C ports | USB-C to monitor | USB-C to monitor |
| Laptop with 1 USB-C port | USB-C dock | Dock outputs to both monitors |
Budget cables work fine for office use. You don’t need $30 “premium” HDMI cables, a $7 Amazon Basics cable does the same thing. Just make sure the cable matches the resolution you need:
- 1080p: Any HDMI or DisplayPort cable
- 1440p: HDMI 1.4+ or DisplayPort 1.2+
- 4K: HDMI 2.0+ or DisplayPort 1.4+
Step 2: Connect Both Monitors
Laptop Setup
Option A: Direct connection (two ports)
- Connect Monitor 1 via HDMI
- Connect Monitor 2 via USB-C (with a USB-C-to-HDMI adapter if the monitor doesn’t have USB-C input)
- Both monitors should light up automatically
Option B: Docking station (one cable)
- Connect the docking station to your laptop via USB-C/Thunderbolt
- Connect Monitor 1 to the dock’s HDMI output
- Connect Monitor 2 to the dock’s DisplayPort output (or second HDMI)
- Your laptop charges through the dock too, one cable does everything
Option C: Monitor daisy-chaining (DisplayPort) Some monitors with DisplayPort 1.2+ output support daisy-chaining: Laptop → Monitor 1 → Monitor 2. Check your monitor’s specs for “DisplayPort Out” or “MST” (Multi-Stream Transport). This avoids needing two cables from your laptop.
Desktop Setup
- Connect Monitor 1 to GPU DisplayPort output 1
- Connect Monitor 2 to GPU DisplayPort output 2 (or HDMI)
- Both monitors should be detected automatically
Important: Do NOT connect one monitor to the GPU and the other to the motherboard. This can cause driver conflicts and performance issues, and the motherboard ports may be disabled entirely if a discrete GPU is installed.
Apple Silicon Mac Quirks
Here’s the annoying part:
| Mac | External Displays Supported |
|---|---|
| MacBook Air M1/M2 | 1 (natively) |
| MacBook Air M3/M4 | 2 (with lid closed: 2, open: 1) |
| MacBook Pro M1/M2 Pro | 2 |
| MacBook Pro M3 Pro+ | 2-3 (varies by chip) |
| Mac Mini M4 | Up to 3 |
| Mac Studio | Up to 5 |
If your MacBook only supports one external display and you want two, a DisplayLink adapter is the workaround. It uses software rendering instead of native GPU output. Works fine for office tasks, but you’ll notice slight lag in video playback or cursor movement. Not ideal, but functional.
Step 3: Configure Display Settings
Windows
- Right-click desktop → Display settings (or Settings → System → Display)
- You’ll see two rectangles representing your monitors
- Drag them to match their physical position (left/right, or top/bottom)
- Click each monitor and set:
- Resolution: Native resolution (the highest option) for both
- Scale: 100% for 1080p monitors, 125-150% for 4K monitors
- Multiple displays: “Extend these displays” (not “Duplicate”)
- Click “Make this my main display” on whichever monitor you want as primary
Pro tip: If your monitors are slightly different heights physically, you can offset the rectangles in Display Settings so your cursor transitions smoothly between screens without jumping.
macOS
- System Settings → Displays
- Click Arrange to drag monitor positions
- The monitor with the white bar at the top is your primary display, drag the bar to switch
- Set resolution: “Default for display” or “Scaled” if you want more space
- Color profile: Leave at default unless you do design work
Useful Settings Most People Miss
- Windows: Snap Layouts (Win + Z), Snap windows into preset layouts on each monitor
- Windows: Virtual desktops (Win + Tab), Create separate desktop environments across both screens
- macOS: Mission Control, Swipe up with three fingers to see all windows across both displays
- Both: Mouse cursor speed, You may need to increase cursor speed since you’re covering twice the screen real estate
Step 4: Position Monitors Ergonomically
This is where most dual-monitor setups go wrong. Two monitors at the wrong height or angle will give you neck pain faster than one monitor at the wrong height.
The Right Position
If you use both monitors equally (50/50):
- Place both monitors side by side, centered on your body
- The inner edges should touch (or be as close as possible)
- You’ll naturally look slightly left and right, that’s fine
- Angle each monitor ~15° inward so you face them head-on when turning
If you have a primary monitor (70/30 or 80/20):
- Place the primary monitor directly in front of you, centered
- Place the secondary monitor to one side at the same height
- Angle the secondary ~30° toward you
- This is the setup most people should use
Height and Distance
| Parameter | Target |
|---|---|
| Screen height | Top of screen at or slightly below eye level |
| Distance | Arm’s length (~20-26 inches) |
| Tilt | Slight backward tilt (10-20°) |
| Both monitors | Same height, use a monitor arm or stack of books |
The biggest mistake: One monitor at the right height and one sitting on its stand 3 inches lower. Your neck will hate you within a week. A dual monitor arm fixes this, both screens float at the exact same height, and you reclaim the desk space under them.
Recommended Dual Monitor Arms
| Arm | Price | Weight Capacity | Best For |
|---|---|---|---|
| VIVO Dual Arm | ~$36 | 22 lbs/arm | Budget |
| Ergotron LX Dual | ~$280 | 25 lbs/arm | Premium |
| AmazonBasics Dual | ~$110 | 25 lbs/arm | Mid-range |
If you already have a good setup but your screens still feel low, even a laptop stand under your secondary laptop display helps.
Step 5: Optimize Your Workflow
Having two monitors is one thing. Using them well is another.
The Best Dual Monitor Layouts
Layout 1: Focus + Communication
- Primary: Your main work (documents, code, design)
- Secondary: Email, Slack, Teams, calendar
Layout 2: Reference + Work
- Primary: Active document or project
- Secondary: Reference material, research, or data
Layout 3: Content + Preview
- Primary: Editor (code, writing, design tool)
- Secondary: Preview or output (browser, compiled app, presentation)
Layout 4: Monitoring + Work
- Primary: Active tasks
- Secondary: Dashboards, analytics, or system monitoring
Windows Shortcuts for Dual Monitors
| Shortcut | Action |
|---|---|
Win + Shift + Left/Right | Move active window to other monitor |
Win + Left/Right | Snap window to left/right half of current monitor |
Win + Up | Maximize window on current monitor |
Win + P | Toggle display mode (extend, duplicate, etc.) |
macOS Shortcuts
| Shortcut | Action |
|---|---|
| Drag to screen edge | Tile window to half (macOS Sequoia+) |
Ctrl + Left/Right | Switch between desktop spaces |
| Mission Control + drag | Move windows between displays |
Common Problems (and Fixes)
“My second monitor isn’t detected”
- Check the cable connection, reseat both ends
- Make sure the monitor is on the correct input (HDMI 1 vs HDMI 2)
- Windows: Settings → Display → “Detect” button
- macOS: System Settings → Displays → hold Option key, click “Detect Displays”
- Try a different cable, bad cables are more common than you’d think
- Update your GPU drivers (Windows: Device Manager → Display Adapters → Update)
“The resolution looks wrong”
- Set each monitor to its native resolution (the highest option)
- If text is too small at native 4K, increase scaling (125% or 150%) instead of lowering resolution
- If one monitor looks blurry, check that you’re using the right cable for the resolution (see cable table above)
“Colors look different between monitors”
- Normal. Different monitor models have different color profiles
- Calibrate both monitors: Windows → Display → “Color profile”; macOS → Displays → “Color profile”
- If it really bugs you, the only true fix is buying two identical monitors
”My cursor gets stuck between monitors”
- The monitors aren’t aligned correctly in Display Settings
- Go to Settings → Display and adjust the vertical positioning of the rectangles
- Make sure the edges line up where the monitors physically meet
”My laptop gets hot with two monitors”
- Expected, driving external displays uses more GPU power
- Make sure vents aren’t blocked
- A laptop stand improves airflow significantly
- Close unnecessary apps and browser tabs
- If using a dock, make sure it provides sufficient power delivery
What You’ll Need: The Shopping List
Already Have Two Monitors
| Item | Cost | Notes |
|---|---|---|
| Cables (2x) | ~$7-15 each | Match your port types |
| Dual monitor arm (optional) | ~$36-280 | Highly recommended for ergonomics |
| Total | ~$14-310 |
Have One Monitor, Need Another
| Item | Cost | Notes |
|---|---|---|
| Second monitor | ~$280-680 | Match your existing monitor’s size if possible |
| Cables (1-2x) | ~$7-15 each | |
| Dual monitor arm (optional) | ~$36-280 | |
| Total | ~$323-975 |
Starting From Scratch (Laptop User)
| Item | Cost | Notes |
|---|---|---|
| Two monitors | ~$560-1,360 | See our monitor guide |
| USB-C docking station | ~$50-200 | See our docking station guide |
| Dual monitor arm | ~$36-280 | |
| Total | ~$646-1,840 |
Is It Worth It?
Yes. Next question.
Seriously though, a dual monitor setup is the highest ROI desk upgrade after a good chair. You’ll alt-tab less, multitask better, and wonder how you ever worked on one screen. The setup takes 30 minutes, the cables cost less than lunch, and the productivity gain is noticeable from day one.
Now go set up your second monitor. Your future self will thank you.
Not sure if you should go dual or ultrawide? Read our ultrawide vs dual monitors comparison for a detailed breakdown by work type.
More desk upgrades: Check the complete desk upgrade guide for the full home office roadmap, chairs, desks, monitor arms, cable management, and everything else.
Related Articles

7 Best WFH Monitors in 2026, Tested & Ranked
I tested 7 monitors for working from home across every budget ($240–$1,020). Best 4K, ultrawide, and USB-C picks, plus one clear top choice for most people.
7 Best USB-C Docking Stations for Home Office (2026)
I compared Thunderbolt 4, USB-C, and DisplayLink docks for every budget. Here are the 7 best docking stations for your home office, from ~$25 to ~$400.

Cable Management Tips: How to Hide Desk Cables (2026 Guide)
Transform your messy desk into a clean workspace. Practical cable management tips, best products, and step-by-step guide to hiding cables under your desk.