
Printing with TPU & Flexible Filaments: Beginner Guide
Everything you need to know about 3D printing with TPU and flexible filaments in 2026. From printer settings to drying methods and preventing jams.

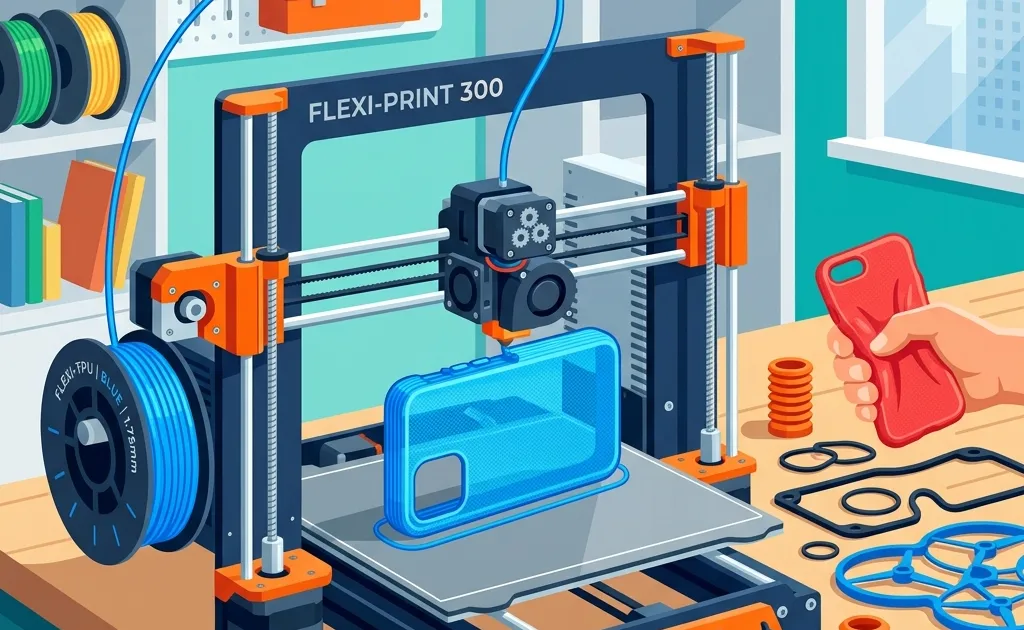
Print TPU slowly, dry, and with retraction almost off. Start at 20 to 30 mm/s on a direct-drive printer (15 mm/s on a Bowden setup), keep the first layer at 10 to 15 mm/s, limit retraction to 0.5 to 1 mm at 15 to 20 mm/s, and begin with a stiffer 95A or 98A filament before trying anything softer. TPU absorbs moisture faster than PLA, so a spool that has been open for a week prints stringy until it is dried. Get those four things right and the material that supposedly jams every extruder prints phone cases and gaskets without drama.
Once you have mastered the basics of PLA and PETG, the natural next step in your 3D printing journey is flexible filament. Thermoplastic Polyurethane, universally known as TPU, unlocks an entirely new world of functional prints. With it, you can create custom phone cases, drone bumpers, gaskets, watch bands, and shock absorbers.
However, TPU has a reputation for being notoriously difficult to print. If you treat it like PLA, it will wrap around your extruder gears, jam your hotend, and string like a spiderweb across your build plate.
Master 3D printing from start to finish: Dive into our complete 3D Printing Guide for Beginners covering printers, troubleshooting, and project ideas.
In 2026, 3D printing hardware has evolved. We now have smarter extruders, better slicer profiles, and more accessible filament dryers. Printing flexible materials is no longer a dark art reserved for experts. This comprehensive guide will walk you through everything you need to know to successfully print TPU and other flexible filaments, even if you are an absolute beginner.
Understanding Flexible Filaments: The Shore Hardness Scale
Before you buy your first spool of flexible filament, you need to understand how flexibility is measured. The 3D printing industry uses the Shore Hardness scale to quantify how soft or rigid a material is.
Flexible filaments typically fall onto the Shore A scale.
- 85A: Very soft and squishy, similar to a rubber band or shoe gel insert. This is incredibly difficult to print and requires a highly specialized direct drive extruder.
- 95A: The industry standard for TPU. It is flexible but firm, similar to a shopping cart wheel or a standard rubber shoe sole. It provides a great balance between flexibility and printability.
- 98A: A stiffer flexible filament. It bends under pressure but holds its shape well. This is the easiest flexible filament to print and is highly recommended for beginners, especially if you are using a Bowden style printer.
When you shop for TPU, always check the Shore hardness rating. If you are just starting out, buy a roll of 95A or 98A. Do not attempt to print 85A until you have mastered the firmer variants.
The Number One Rule: Dry Your Filament
If you only take one piece of advice from this entire guide, let it be this: you must dry your TPU before you print it.
TPU is extremely hygroscopic, which means it actively absorbs moisture from the air. Even a brand new, vacuum-sealed spool straight from the factory can be wet. When you print wet TPU, the moisture inside the plastic boils as it passes through the hot nozzle. This creates microscopic steam bubbles that burst, resulting in a popping sound during printing.
The physical results of wet TPU are disastrous. You will experience massive stringing, inconsistent extrusion, poor layer adhesion, and a rough, ugly surface finish. No amount of slicer tweaking or hardware upgrades can fix wet filament.
To dry your TPU, you need a dedicated filament dryer or a food dehydrator. Place the spool in the dryer at 50 to 55 degrees Celsius for at least 6 to 8 hours before printing. For the best results, print directly out of the active dryer so the filament does not reabsorb moisture during a long print.
Do not try to dry TPU in your kitchen oven. Most residential ovens cannot hold a consistently low temperature, and you run a very high risk of melting the plastic spool and ruining your filament.
Hardware Requirements: Direct Drive vs Bowden
The way your 3D printer pushes filament into the hotend will dictate your success with flexible materials.
The Direct Drive Advantage
In a direct drive system, the extruder motor and gears are mounted directly on top of the hotend. The distance between the gears pushing the filament and the melt zone is incredibly short. This is the ideal setup for TPU. Because the filament has nowhere to buckle or bend, you can push it with precision, allowing for reliable extrusion and effective retractions. Modern printers like the Bambu Lab series or printers equipped with Sprite extruders excel at printing TPU straight out of the box.
The Bowden Challenge
In a Bowden system, the extruder motor is mounted on the frame of the printer, and it pushes the filament through a long PTFE tube (the Bowden tube) down to the hotend. Pushing a soft, flexible string of TPU through a long tube is like trying to push a wet noodle through a straw. It compresses, buckles, and causes massive lag in extrusion.
If you have a Bowden printer (like an older Creality Ender 3), you can still print TPU, but you must make compromises. You need to use a stiffer TPU (98A), print very slowly (around 15 mm/s), and turn off retractions completely. Upgrading to a Capricorn PTFE tube can help slightly by reducing the internal diameter and giving the filament less room to buckle, but a direct drive upgrade is the ultimate solution.
Perfecting Your Slicer Settings
Once your filament is dry and your hardware is ready, you need to configure your slicer. Do not use your standard PLA profile. Create a dedicated TPU profile and adjust the following settings.
1. Print Speed (Slow Down)
Speed is the enemy of flexible filament. If you try to push TPU through the nozzle too quickly, pressure builds up in the hotend. Because the filament is soft, it will find the path of least resistance, which is usually escaping out the side of the extruder gears, causing a massive jam.
Start with a print speed of 20 to 30 mm/s for a direct drive printer. If you are using a Bowden setup, drop this down to 15 mm/s. Keep your first layer speed extremely slow, around 10 to 15 mm/s, to ensure perfect adhesion. Once you get a successful print, you can incrementally increase the speed to find your printer’s limit, but patience is key.
2. Temperature Settings
TPU typically prints slightly hotter than PLA. Most blends require a nozzle temperature between 220 and 240 degrees Celsius. Check the manufacturer’s recommendation on the spool.
For the heated bed, TPU does not require extreme temperatures. A bed temperature of 40 to 50 degrees Celsius is usually sufficient. In fact, TPU adheres incredibly well to most build surfaces (PEI, glass, buildtak). If you print for a car interior, my 3D printable car gadgets guide covers which flexible and rigid filaments survive summer heat.
3. Retraction Configuration
Retraction is the process of pulling the filament back slightly during travel moves to prevent oozing and stringing. With PLA, quick and long retractions are standard. With TPU, retractions are problematic.
When the extruder gears yank the soft TPU backward, it stretches. When it pushes it forward again, it compresses. This constant stretching and compressing leads to inconsistent extrusion and under-extrusion after travel moves.
If you have a Bowden printer, turn retraction completely off. It is better to deal with stringing than a jammed extruder.
If you have a direct drive printer, you can use very conservative retraction settings. Start with a retraction distance of 0.5 to 1.0 mm and a retraction speed of 15 to 20 mm/s. Never use fast retraction speeds with flexible filament.
4. Cooling Fans
TPU has excellent layer adhesion when printed hot. To maximize strength, keep your part cooling fan low or off for the first few layers. For the rest of the print, a fan speed of 30 to 50 percent is usually ideal. If you are printing small details or extreme overhangs, you can increase the fan speed, but too much cooling can weaken the bond between the flexible layers.
5. Infill and Wall Thickness (Controlling Flexibility)
The true magic of printing with TPU is that you can control the flexibility of the final part through your slicer settings. The material itself has a set hardness, but the geometry of your print dictates how it behaves.
If you want a part to be very soft and squishy (like a stress ball or a soft bumper), use a low infill percentage (5 to 10 percent) and only 1 or 2 wall perimeters. Gyroid is an excellent infill pattern for TPU because it compresses uniformly in all directions.
If you want a part to be firm and durable (like a rubber mallet head or a structural gasket), increase the infill to 50 percent or higher and use 4 to 5 wall perimeters. A high density TPU part is incredibly tough and nearly impossible to break or tear by hand.
Troubleshooting Common TPU Problems
Even with the perfect setup, you will likely encounter some issues when learning to print TPU. Here are the most common problems and how to fix them.
Extruder Jams (The Filament Wrap)
This is the most common issue. You start a print, and 10 minutes later, the printer is moving but no plastic is coming out. You look at your extruder and see that the TPU has wrapped itself tightly around the drive gears.
This happens because the filament buckled under pressure. To fix this:
- Slow down your print speed. You are trying to push the plastic faster than it can melt.
- Reduce your retraction distance and speed.
- Ensure your hotend is not partially clogged, which increases back-pressure.
- If your extruder has an adjustable tension arm, loosen it slightly. Too much pressure will squash the TPU, making it wider and harder to push into the hotend tube.
Massive Stringing
If your print looks like it is covered in spiderwebs, your filament is likely wet. Dry it immediately.
If you have dried it for 8 hours and it is still stringing, you need to adjust your travel settings. Increase your non-print travel speed (how fast the print head moves when not extruding) to 150 mm/s or higher. This fast movement snaps the string of plastic before it can stretch across the build plate. You can also enable settings like “Combing” or “Avoid crossing perimeters” in your slicer, which keeps travel moves inside the boundaries of the printed part, hiding the strings internally.
Poor First Layer Adhesion
TPU usually sticks too well to the bed, not the other way around. If you are struggling with adhesion, ensure your bed is perfectly clean (wash with dish soap and water, then wipe with isopropyl alcohol). Slow your first layer speed down to 10 mm/s. Ensure your Z-offset is not too high; TPU needs a decent amount of “squish” into the build plate to grip properly.
Removing TPU from the Build Plate
Because TPU bonds aggressively to PEI and glass, removing large prints can be terrifying. Never yank a TPU print straight up, as you risk tearing the part or damaging your bed.
Instead, let the bed cool completely to room temperature. If you have a flexible magnetic build plate, pop it off and flex it. If you have a rigid glass bed, spray a small amount of isopropyl alcohol around the base of the print. The alcohol will seep under the plastic and release the bond, allowing you to peel the print off easily.
Post-Processing Flexible Prints
Unlike PLA or ABS, you cannot sand TPU. If you try to sand a flexible part, it will just fuzz up and look terrible.
To clean up a TPU print, you need a very sharp pair of flush cutters or an X-Acto knife to snip away strings or blobs. To restore a glossy finish and melt away microscopic stringing, briefly hit the part with a heat gun. Be careful not to hold the heat gun in one spot for too long, or the thin walls of your part will melt and warp.
Practical Projects for Your First Spool
Once you have dialed in your settings, it is time to put that spool to work. Here are some excellent starter projects that utilize the unique properties of flexible filament:
- Custom Phone Cases: The classic TPU project. You can design custom textures, patterns, and thicknesses that you cannot buy in a store.
- Custom Gaskets and Seals: Need a watertight seal for a project? Print a custom gasket. TPU works exceptionally well for sealing low-pressure water fittings.
- Vibration Dampeners: Print custom feet for your 3D printer, your air compressor, or any noisy appliance to absorb vibrations and reduce noise.
- Drone Bumpers and Mounts: FPV drone pilots love TPU for printing camera mounts and arm bumpers because it survives high speed crashes without shattering.
- Custom Grips: Print ergonomic sleeves for your tools, bicycle handles, or kitchen utensils.
The Bottom Line
Printing with TPU and flexible filaments opens a massive door for functional, real-world applications. While it demands more patience and preparation than standard rigid plastics, the payoff is immense.
Start by ensuring you have the right hardware (a direct drive extruder is highly recommended), buy a firmer 95A or 98A filament, and dry it thoroughly before you even attempt your first print. Slow down your slicer settings, manage your expectations regarding stringing, and you will soon be creating functional, flexible parts that no standard PLA could ever match.
For more beginner guides, check out our tutorial on understanding sensor sizes in photography or our breakdown of the best functional 3D prints to get more ideas for your newly calibrated machine.
Related Articles
3D Printing Guide 2026: Everything You Need to Know
From choosing your first printer to selling your prints, this complete 3D printing guide covers everything beginners need. Start your journey here.

Your First 3D Print in 2 Hours: Setup to Finished Part
From unboxing to a finished part in one afternoon: picking a printer under $300, PLA versus PETG, slicer setup, and the first print that actually works.
10 Reasons Your 3D Print Failed, and the Fix for Each
Warped corners, stringing, clogged nozzles, wrong temperatures. The ten errors that cost new printer owners the most filament, and what to change for each one.