
Beyond the AMS: Mastering Bambu Studio's New Optical Filament Mixing
Master Bambu Studio 2.6.0's experimental 'Mixed Filament' feature. Learn how optical layer alternation creates full-color prints on the H2C and X2D.
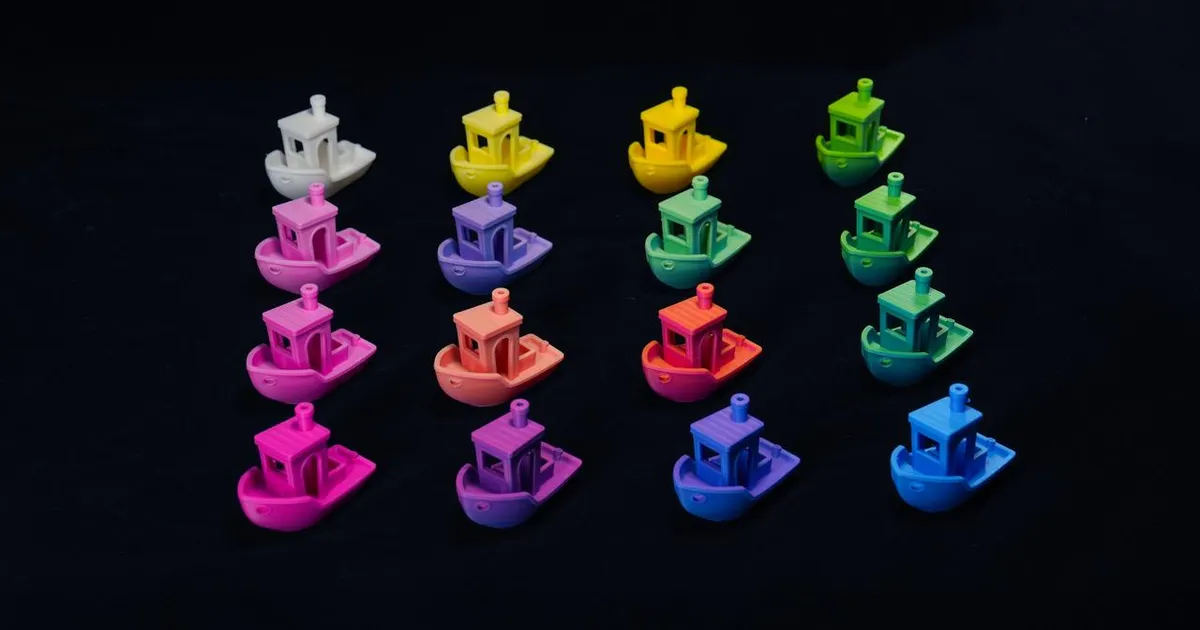

For years, the “holy grail” of consumer 3D printing has been true, full-color reproduction. We’ve had the Bambu Lab AMS (Automatic Material System) for a while now, which gave us the ability to switch between four, eight, or even sixteen different spools. But even with sixteen spools, we were still limited to the colors we physically owned. If you wanted a specific shade of “Sunset Orange” but only had “Fire Engine Red” and “Sunflower Yellow,” you were out of luck.
That changed with the release of Bambu Studio 2.6.0.
By introducing the experimental Mixed Filament feature, Bambu Lab has effectively shifted the paradigm from “color swapping” to “color mixing.” It’s not a hardware upgrade, it’s a software revolution that leverages the precision of modern motion systems to trick the human eye.
In this guide, we’re going to explore how this technology works, why it marks a turning point for the community, and how you can start using it today, provided you have the right hardware to handle the overhead.
1. The Science of the “Cheat”: Optical Layer Alternation
The first thing to understand is that your Bambu printer has not suddenly grown a mixing nozzle. There is no CMYK mixing chamber inside the hot end. Instead, Bambu Studio is using a technique called Optical Layer Alternation.
This concept was largely popularized by the community-led FullSpectrum project (more on that later), and it relies on the way our brains process light and color. If you print a layer of white filament that is 0.08mm thick on top of a layer of red filament that is 0.08mm thick, the result doesn’t look like a stack of two colors. Because the filament is slightly translucent at those thicknesses, the light reflects through both layers, and your eye perceives it as a soft pink.
By varying the thickness and frequency of these alternating layers, the slicer can create a massive gamut of colors from just a few base spools. In the 2D world, we call this halftoning or dithering. In the 3D world, we are now calling it mixing.
The Gamut Advantage
With a standard AMS setup, you are limited to $N$ colors, where $N$ is the number of spools. With Optical Mixing, those same $N$ spools can represent thousands of intermediate shades. If you load Cyan, Magenta, Yellow, and White (CMYW), you can theoretically reproduce almost any color in the visible spectrum, much like a traditional inkjet printer.
2. A Nod to the Community: The FullSpectrum Origins
It would be remiss to talk about this feature without mentioning its origins. Long before it was an official feature in Bambu Studio, a developer known as ratdoux introduced the “FullSpectrum” project for OrcaSlicer.
The 3D printing community has a long history of “hacking” hardware to do things it wasn’t intended for. FullSpectrum was a post-processing script that took a multi-color model and recalculated the G-code to insert thousands of micro-layer changes. It was complex, buggy, and prone to crashing the printer’s buffer, but it proved that the concept worked.
Bambu Lab, to their credit, saw the potential and integrated a refined, native version of this logic directly into their slicer. This official implementation is significantly more stable, handling the “purge” logic and transition towers with much higher efficiency than the community scripts ever could.
3. Setting Up Your First Mixed Print
Using the feature is surprisingly straightforward, though it is currently hidden behind an “Experimental” flag in the settings.
Step 1: Define Your Palette
In the filament list on the left side of Bambu Studio, you’ll see a new ”+” icon next to the “Add Mixed Filament” button. When you click this, a dialog box opens where you select your “Base Filaments.”
For the best results, I recommend using a standard CMYW palette. Bambu has even started selling “Vision Series” filaments specifically designed with controlled translucency for this exact purpose.
Step 2: Creating the Mix
Once your base filaments are selected, you can create a new “Mixed Filament” entry. You can either:
- Use the Color Picker: Select any color from a standard RGB wheel, and the slicer will calculate the necessary ratio of your base filaments.
- Manual Ratio: If you’re going for an artistic effect, you can manually set the percentages (e.g. 70% White, 30% Blue).
Step 3: Slicing for Success
The “Mixed Filament” now acts like any other filament in your list. You can paint it onto your model using the Paint Bucket tool or assign it to specific objects.
Crucial Setting: To get the optical blending to work, you MUST use a low layer height. I’ve found that a 0.08mm or 0.12mm layer height is the sweet spot. Anything thicker, and the eye starts to see the individual “stripes” of color rather than a blended shade.
4. The Hardware Reality Check: Why the H2C and X2D Matter
Here is the catch: Optical Mixing requires a lot of filament changes.
If you are printing a 10cm tall figure with 0.1mm layers, you have 1,000 layers. If every layer alternates between two colors, that is 1,000 filament changes. On a standard X1-Carbon or P1S with a single nozzle, each change takes about 90 seconds and produces a significant amount of purge waste (poop).
Printing a mixed-color model on an X1C can easily take 48 hours and waste three times more filament than the model itself weighs. I’ve seen prints where the purge tower was literally taller and heavier than the model itself. This is “The Purge Problem,” and it has been the primary barrier to adoption for this technology until now.
This is why the Bambu Lab H2C and the new X2D flagship are the real stars of this show. As we discussed in our H2 Series comparison, the H2C features the Vortek system, which can swap between six different hot ends in under five seconds.
Because the H2C isn’t retracting the filament back to the AMS but instead just swapping the entire active head, the “penalty” for a color change is almost zero. There is no purge waste because each nozzle stays primed with its own color. It’s like having a six-shooter revolver but for hot ends. The slicer orchestrates the dance, and the hardware executes it with a speed that makes the old “retract-and-purge” dance look like a relic of the stone age.
If you’re serious about using the mixing feature for anything other than small test cubes, the H2C is effectively mandatory. The software has unlocked the potential, but the hardware is what makes it practical.
5. Calibration: Why Your Plastic Matters
One of the most overlooked aspects of optical mixing is the material itself. Not all PLA is created equal when it comes to light transmission. If you use a highly opaque filament (like most “Matte” PLAs), the colors won’t blend; they will simply cover each other up, resulting in a muddy, stratified look.
Bambu Lab anticipated this with the release of the Transmission Calibration Tool included in the utility menu of Bambu Studio 2.6.0
This tool allows you to measure the specific “Translucency Factor” (TF) of any filament. You print a small “stepped” wedge, measure the light transmission with a simple sensor (or even your phone’s camera in a pinch), and input the values into the slicer. Once calibrated, the slicer knows exactly how much light passes through at a given thickness. This allows it to adjust the layer ratios with extreme precision. For example, if you’re mixing a translucent Cyan and an opaque White, the slicer knows that it needs exactly two layers of Cyan to override one layer of White.
It’s a bit of work, but it’s the difference between a “printed toy” look and a “professional manufactured” look. While any filament can work, using filaments with high translucency, like Bambu’s PETG HF or their specialized translucent PLA lines, will yield the most vibrant results.
6. Deep Dive: The CMYW vs. RGB Battle
Most of us think in RGB (Red, Green, Blue) because that’s how our screens work. But 3D printing is a subtractive process, much like traditional paper printing. This means we should be thinking in CMYK (Cyan, Magenta, Yellow, Black).
However, in 3D printing, we don’t really have “transparent” ink. We have “translucent” plastic. This is why Bambu Studio defaults to a CMYW (Cyan, Magenta, Yellow, White) palette.
Why White instead of Black? Because in 3D printing, the “canvas” is the object itself. We use White to control the “Value” (brightness) of the color. If you want a deep navy blue, you use a high ratio of Cyan and Magenta with very little White. If you want a sky blue, you crank up the White ratio.
The math happening behind the scenes is staggering. For every single pixel (or rather, every single line of G-code), the slicer is calculating the “Subtractive Light Path.” It considers the color of the layer below, the thickness of the current layer, and even the color of the infill behind it.
I spent an afternoon testing a “Banana for Scale” print using just CMYW. On a standard machine, this would have been a 4-color print (Yellow, Brown, Green, White). With mixing, I was able to get the subtle brown bruising on the peel, the greenish transition at the stem, and a soft, natural yellow body, all from the same four spools. The level of realism is something that simply wasn’t possible with traditional color swapping. Note that currently, these mixed-filament files cannot be uploaded to MakerWorld, so you’ll have to share your masterpieces as raw .3mf files or G-code for now.
7. Optimal Settings and Pro Tips
After spending three weeks with the beta builds of 2.6.0, here are my recommendations for getting the most out of the mixing feature:
- Focus on Vertical Walls: The optical blending works best on surfaces that are vertical or near-vertical. On flat top surfaces, the slicer has to use a different “dithering” pattern that can look a bit more “grainy.”
- Layer Height Sweet Spot: For a standard 0.4mm nozzle, the official recommendation is a 0.12mm base layer height combined with a 0.2mm mixed layer height. This provides the best balance between color accuracy and print stability.
- Increase Walls: Use at least 3 walls. The mixing logic often replaces internal infill patterns with color-alternating shells to save time, and having extra walls ensures the “inner” colors don’t bleed through in ugly ways.
- The ‘Purge to Infill’ Hack: If you are printing on a single-nozzle machine, ALWAYS enable “Purge into Infill” and “Purge into Object.” It won’t eliminate the waste, but it will hide some of it inside the model’s structure.
- Nozzle Size: While you might be tempted to use a 0.2mm nozzle for more detail, a 0.4mm nozzle actually produces better color blending. The wider extrusion width allows for more surface area for light to bounce through the translucent layers.
6. The Future of Additive Color
Is this just a gimmick? I don’t think so.
What we are seeing is the birth of “Post-Processing in the Slicer.” By moving away from the physical limitations of the plastic and toward the digital manipulation of how that plastic is laid down, Bambu Lab is opening doors that were previously only available to $50,000 industrial PolyJet machines.
We are already seeing community members using this feature to create functional gradients, parts that transition from rigid to flexible by mixing PLA-like materials with stiffer variants (though adhesion is still an experimental hurdle). We are seeing labels that are part of the object’s “DNA” rather than just a layer on top.
The Bambu Studio 2.6.0 Mixing Feature isn’t perfect. It’s slow on old hardware, it’s experimental, and it requires a bit of a “color science” degree to master. But it is a glimpse into a future where the color of your filament spool matters less than the logic in your slicer.
And for those of us who live for “productive procrastination,” spending a weekend fine-tuning the perfect shade of “Midnight Teal” is exactly the kind of rabbit hole we love to fall down.
Related Articles
- The 2026 State of Additive: Why the Bambu Lab H2 Series Still Matters
- 3D Printing for Coffee Nerds: Building the Perfect Setup
- 10 Practical Desk Upgrades You Can 3D Print
- The $599 Miracle: One Month with the MacBook Neo
For more insights, check out our guide on productivity. Also, learn more at the official Wikipedia page.
Related Articles

The 2026 State of Additive: Why the Bambu Lab H2 Series Still Matters
Is the Bambu Lab H2 series still relevant after the X2D launch? We revisit the H2S, H2D, and H2C to see how they hold up in the 2026 3D printing landscape.
Bambu Lab X2D vs P1S (2026): Which Should You Buy?
Bambu Lab X2D vs P1S compared: $649 dual-nozzle X2D with heated chamber, or $549 P1S workhorse. Specs, real-world use, and who should buy which.

Bambu Lab A2L Review: The 330mm Large-Format King of 2026
Bambu Lab just dropped the A2L: a 330mm large-format bed-slinger with linear motors and Lidar for $499. Is this the end of the small-printer era?